
Quick Fix: Make a Cheerful Card for Your Mailbox
• What: Brighten a plain envelope with stamps
• Time: 15–20 min
• Skill: Beginner
• Tools & Materials: Plain envelope, quality stamps, ink pad
• Cost: Parts $3–$10
• Safety: No special precautions
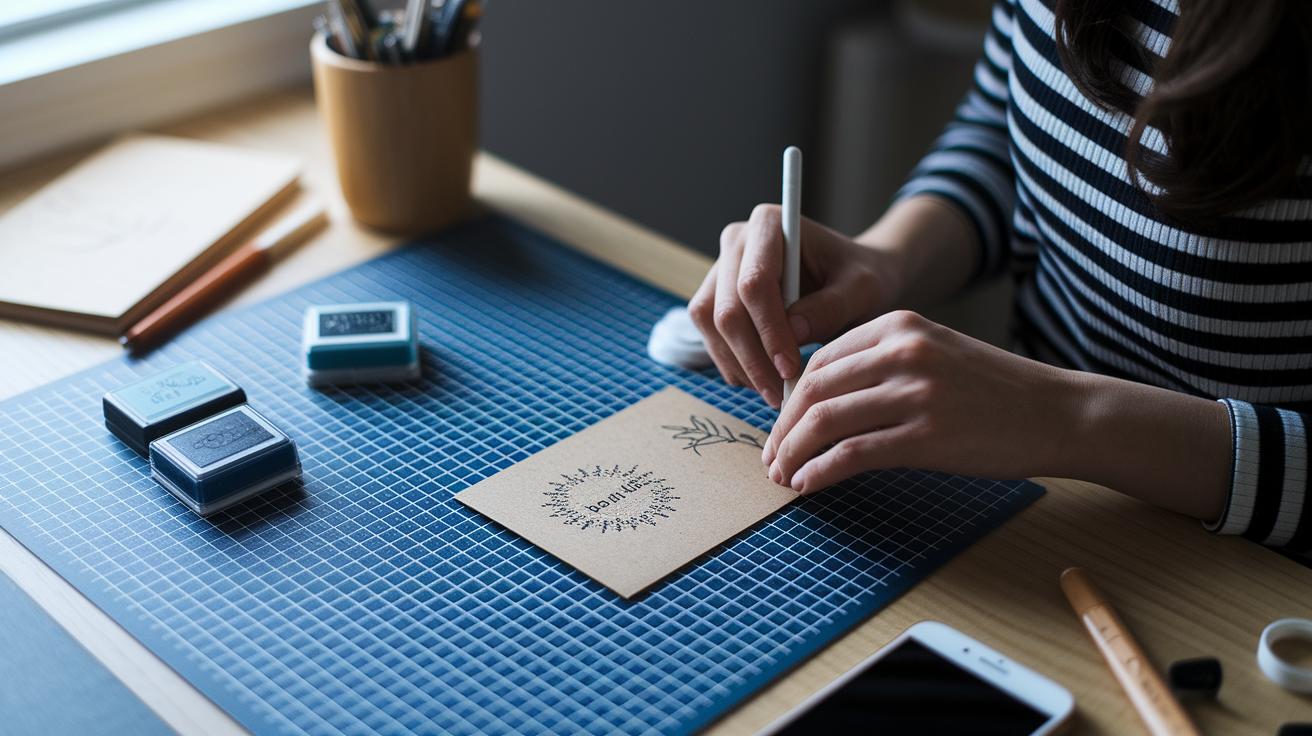
- Pick your plain envelope and a set of stamps you like.
- Press the ink pad onto the stamps and firmly tap them on the envelope to create clear, bold designs.
- Add extra details if you wish, using a pen or marker to personalize your card.
- Let the ink dry before mailing or displaying the card.
This simple project turns an ordinary envelope into a burst of cheer. Enjoy showing off your creativity with each stamped design, you can make every card a warm, unique message that stands out.
Essential Materials for Card Making with Stamps
For crisp card designs, you need good stamps, solid ink pads, and quality paper. Using sets like Stampin’ Up!’s Pretty Florals or the Simply Said collection gives you clear rubber images every time. Strong ink makes your colors pop, and the right paper soaks up ink evenly for a clean look. These supplies save you time and frustration, letting you focus on your creativity. A reliable ink pad can be the difference between a bold, clean image and a mess.
| Supply | Purpose |
|---|---|
| Stamp Sets | For clear, decorative images |
| Ink Pads | Add bright color to your stamps |
| Note Cards/Envelopes | Serve as a strong base for your art |
| Grid Paper | Helps with jotting ideas and sketching designs |
| Adhesives | Keeps extra decorations in place |
Pre-scored cards make your work easier. A perfect card measures 8½ in (21.6 cm) by 5½ in (14 cm) with a fold at 4¼ in (10.8 cm). Buying packs of 20 pre-scored cards and envelopes means you get neat, consistent folds every time. This saves time and keeps your card designs balanced and professional.
Planning Your Stamped Card Layout
Quick Fix:
• Outcome: A warm, personal stamped card design
• Time: 10 min
• Skill: Beginner
• Tools & Materials: Grid paper, card templates, stamps, ink
• Safety: Keep your workspace clear
Steps:
- Think about who will get your card.
- Choose a theme and stamps that match their style.
- Sketch your design using grid paper and a template.
Start by thinking about the person receiving your card. Ask yourself what makes them special and what interests they have. If they love nature, pick stamps with flowers or leaves and match them with nature-inspired words. Use a playful look for a good friend or a more elegant design for a family member. This attention to detail makes every stamp feel personal and warm.
Next, grab some grid paper and a card template to outline your design. Spread the grid on your table and mark light margins where your stamps will go. Try a test impression with one stamp to see how it fits. Templates like the Easy Card Making Template or Pocket Fun Fold keep your layout neat and balanced. With a bit of planning, your stamping process becomes simple and enjoyable.
Step-by-Step Stamping Techniques for Card Making
Quick Fix:
• What: Create a cheerful stamped card
• Time: 15 min
• Skill: Beginner
• Tools: Stamp, ink pad, card base, additional stamping tools
• Cost: Low-cost supplies
• Safety: Work on a clean surface to avoid spills
-
Lay Down the Base Layer
Pick a bright ink that shows off your design. Place your stamp gently on the card and press lightly so the details come through without smudging. Using a light touch helps keep the image crisp. -
Add Your Sentiments and Numbers
Stamp your message neatly on the card. Use number stamps or dies (small tools that make numbers) to mark birthdays or special dates. Try using two ink colors to give your card a fun, lively look. -
Decorate the Card and Envelope
Keep going by stamping inside the card and on the envelope too. This makes your design look complete and professional.
| Technique | Tools Needed |
|---|---|
| Base Layer | Ink pad, card base, stamp |
| Adding Sentiments | Sentiment stamps, number stamps/dies, ink pads |
| Decorating Details | Envelopes, additional stamps, ink pads |
| Final Touches | Clean-up tools, paper towels |
A video tutorial walks you through each step, showing you how to go from a basic stamped card to one with extra layers and detail. Watch the clip for a clear, hands-on demo that makes it easy for you to get creative and enjoy making your own art.
Advanced Embellishments for Stamped Card Designs
Quick Fix:
• What: Boost your card’s look with layers, ribbons, and number stamps
• Time: 15–30 min
• Skill: Intermediate craft skills
• Tools: SIP card, foam adhesive, die-cut shapes, ribbon or bow, metallic ink, ordinal stamps
• Safety: Keep your work area clear
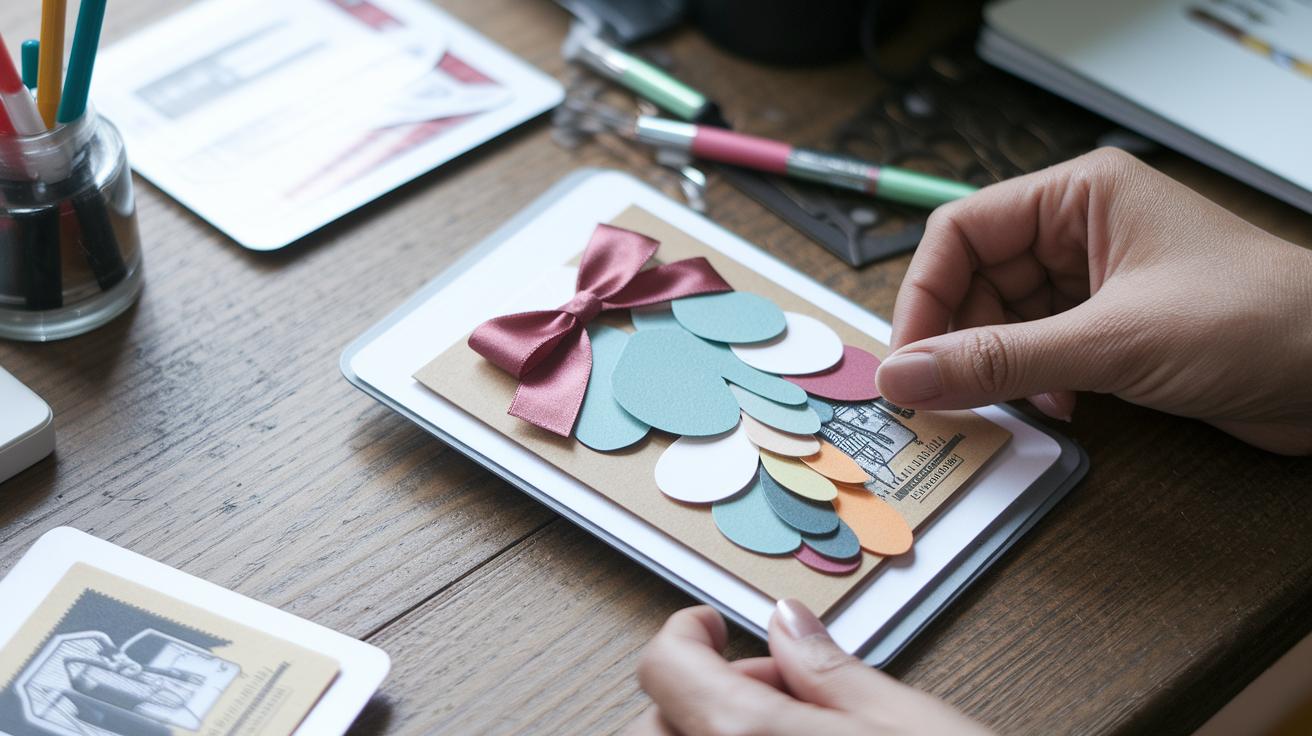
- Start by layering die-cut shapes on your SIP card. This adds depth and gives your stamped images a fresh, tactile feel. Foam adhesive acts like tiny dots that raise your stamps off the surface.
- Next, include a ribbon or a tied bow near your stamped image. This simple accent instantly lifts the card’s appeal. Adding metallic ink can also create a subtle shimmer that catches the light.
- For a personal touch, mix ordinal stamps with number dies. For instance, stamping “17th” makes your card uniquely yours. This detail celebrates special milestones in a fun way.
Experiment with different shapes and accents until you find a look that is both playful and polished. Enjoy the process and let your creativity shine!
Resources and Inspiration for Card Making with Stamps
Quick Fix:
• What: Jump-start your stamped card projects
• Time: 15–30 min per project
• Skill: Beginner to intermediate (no fancy tools needed)
• Tools & Materials: Stamps, ink pads, card stock, templates
• Cost: Often free or low-cost
• Safety: Keep your work area neat and be careful with sharp tools
-
Free Weekly Project Sheets
Get creative with free project sheets sent straight to your email. They offer simple stamped greeting ideas in both spiral-bound books and online formats. Each guide walks you through every step with clear measurements (like 1/4 in/6 mm) so you can easily follow along. Whether you’re making holiday cards or birthday invites, these tutorials help you learn essential stamping skills that boost your DIY spirit. -
Live Classes for Advanced Stamping
In March 2026, join live classes where expert instructors share advanced stamping techniques. Watch real-time demos on creative rubber projects and themed card designs. These sessions let you ask questions and pick up handy tips that take your skills from beginner to pro. Enjoy interactive online classes that turn complex ideas into simple, fun steps. -
Download Templates and Join the Community
Try out new layouts with downloadable templates like Easy Card Making and Pocket Fun Fold. Plus, community forums are a great place to swap ideas, ask for advice, and share your creative successes. These tools and discussions spark fresh inspiration and help you overcome any card-making challenge, filling your projects with energy and cheer.
Final Words
In the action, this guide walked you through choosing top supplies, planning creative layouts, and executing step-by-step stamping techniques.
It covered essential points like selecting premium inks, papers, and pre-scored cards to make striking impressions.
The advanced embellishments and handy resources bring extra spark to your projects.
With these practical tips, card making with stamps becomes a fun, budget-friendly project that you can confidently tackle. Enjoy crafting your unique designs and watch your skills grow.
FAQ
Q: What does free card making with stamps mean?
A: Free card making with stamps means using low-cost methods and everyday supplies to create cards with stamps. You can find free templates online and use basic stamps and inks to start your project without a big investment.
Q: What does card making with stamps for beginners involve?
A: Card making with stamps for beginners involves a straightforward approach using simple tools like pre-scored cards, ink pads, and easy-to-use stamp sets. This method helps you build confidence as you learn creative techniques step by step.
Q: Why is card making with stamps considered easy?
A: Card making with stamps is considered easy because it uses clear, simple techniques like the SIP method and ready-to-use materials. This approach minimizes setup time and streamlines the creative process for quick, attractive results.
Q: What are some card stamping ideas?
A: Card stamping ideas include layering different stamped images, mixing contrasting ink colors, adding short sentiments, and decorating matching envelopes. These techniques allow you to achieve a balanced, eye-catching design on your cards.
Q: What role does Stampin’ Up play in card making?
A: Stampin’ Up offers high-quality stamp sets and supplies that make your card projects smoother. Their products create crisp, clean impressions and a professional look, which many crafters appreciate for both personal and gift cards.
Q: What are DIY punch cards in card making?
A: DIY punch cards refer to creating decorative cut-out shapes using a punch tool. This simple technique adds texture and visual interest, allowing you to personalize and elevate the design of your handmade cards.
Q: Can I sell cards made with Stampin’ Up stamps?
A: You can sell cards made with Stampin’ Up stamps if local laws allow resale of crafted items. Many crafters successfully sell their unique designs, provided they follow any guidelines set by the Stampin’ Up brand policies.
Q: How many stamps are used for a regular greeting card?
A: The number of stamps for a regular greeting card usually falls between two and three images. This count helps maintain a neat, well-balanced layout without overcrowding the design of your card.
Q: What is the difference between embossing and stamping?
A: The difference between embossing and stamping is that embossing uses heat or pressure to create a raised, textured design on paper, while stamping applies ink directly to the surface to imprint images or words.
Q: How do I create my own cards?
A: Creating your own cards involves using pre-scored note cards, quality stamps, and ink pads. Start with a basic layout, experiment with stamp placement, and add personal touches such as sentiments or decorative elements for a unique finish.