
Quick Fix: Patch a Roof Leak with Tape
• What: Seal a roof leak using repair tape
• Time: 10–15 min
• Skill: Beginner
• Tools & Materials: Roof repair tape, scissors, cleaning rag, ladder (if needed)
• Cost: Tape $3–$10
• Safety: Make sure your ladder is stable and keep clear of any falling debris
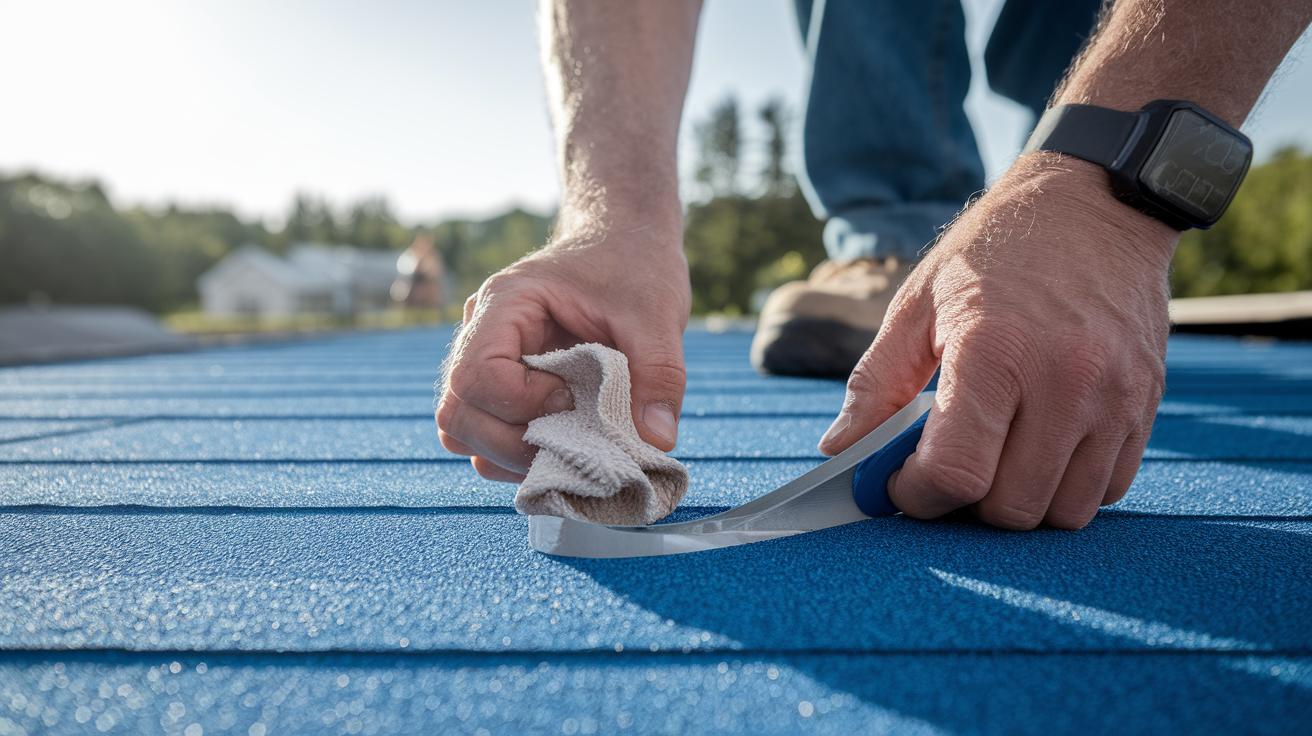
- Clean the area. Wipe off dirt and loose debris so the tape sticks well.
- Dry the surface completely. A dry patch helps the tape seal quickly.
- Cut the tape to the right length. Measure a piece that covers the leak with extra on both sides.
- Press the tape firmly over the leak. Use your hands to smooth it out and remove air bubbles.
- Inspect your work. Make sure the tape seals all around the leak.
Roof repair tape works like a waterproof shield that stops leaks fast and holds up in changing weather. This quick fix can keep your home dry until you can make a lasting repair.
Roof repair tape Delivers Reliable Sealing
Quick Fix:
• What: Stop roof leaks fast with repair tape
• Time: 10–15 min
• Skill: Beginner
• Tools & Materials: Roof repair tape, measuring tape, utility knife, hand roller, gloves, and eye protection
• Cost: Tape $5–$15
• Safety: Work on a clean, dry surface; wear gloves and eye protection
- Measure the leaky area. Mark the edges so your tape will overlap by 2 inches (5 cm) on every side.
- Use your utility knife to cut the tape to the correct size.
- Peel off the tape’s backing (release liner) carefully.
- Place the tape over the leak on a clean, dry roof surface.
- Press the tape firmly with your hand roller to remove any air bubbles.
- Remember, this patch is a temporary fix. It works in temperatures from 0°F (–18°C) to 150°F (65°C) on most tapes. For long-term durability, choose a tape with high tensile strength and UV resistance.
Comparing Butyl, Acrylic, and Fiberglass Roof Repair Tapes
Butyl seal strips work best when it’s hot. They form a strong bond in high temperatures but may get stiff and lose flexibility when it’s freezing.
Acrylic adhesives stick reliably in any weather. They hold on well whether it’s a warm afternoon or a cold morning. One homeowner even said, "I used acrylic tape during a chilly night, and it stayed bonded throughout the cold snap," which shows its steady performance.
Fiberglass-reinforced tape has a strong film that adds extra toughness and resists chemicals. This makes it a solid choice for roofs exposed to heavy rain or chemical runoff. It also stays in place even on uneven surfaces.
Key points to consider:
- Butyl seal strips: Ideal for hot weather but may harden in the cold.
- Acrylic adhesives: Maintain a strong hold across a wide range of temperatures.
- Fiberglass-reinforced tape: Offers extra strength and chemical resistance.
Most roof repair tapes work well between 0°F (–18°C) and 150°F (65°C). Some specialty tapes can handle even wider temperature ranges, giving you more confidence in extreme climates.
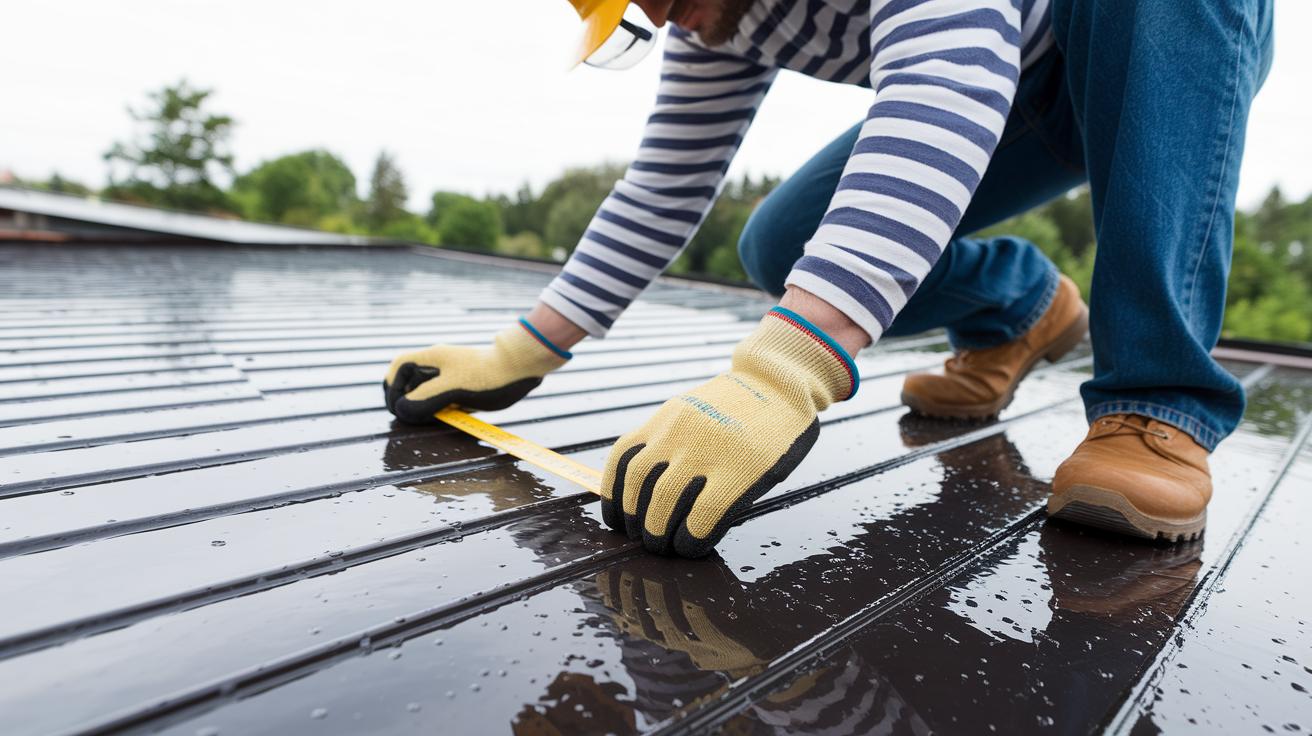
Preparing the Roof Surface for Roof Repair Tape
Quick Fix:
• What: Get your roof ready for repair tape
• Time: 15 min
• Skill: Beginner (basic cleaning and light scraping)
• Tools & Materials: roof repair tape, utility knife, measuring tape, clean rag, gloves, eye protection
• Cost: Parts $3–$10
• Safety: Wear gloves and eye protection
- Gather your supplies: roof repair tape, utility knife, measuring tape, clean rag, gloves, and eye protection.
- Clean the roof using mild soap and water. Rub gently with a clean rag to remove dirt, rust, loose granules, and paint flakes.
- Rinse off the soap with water, then let the roof dry completely. Moisture can stop the patch from sticking well.
- Look over the roof for any stubborn dirt or rust spots. Use the utility knife to lightly scrape off any peeling areas. Check the size with a measuring tape to ensure you have enough tape for proper overlap.
- Follow your repair guide by inspecting every part of the area. This careful prep ensures the tape bonds well and seals reliably for a temporary fix.
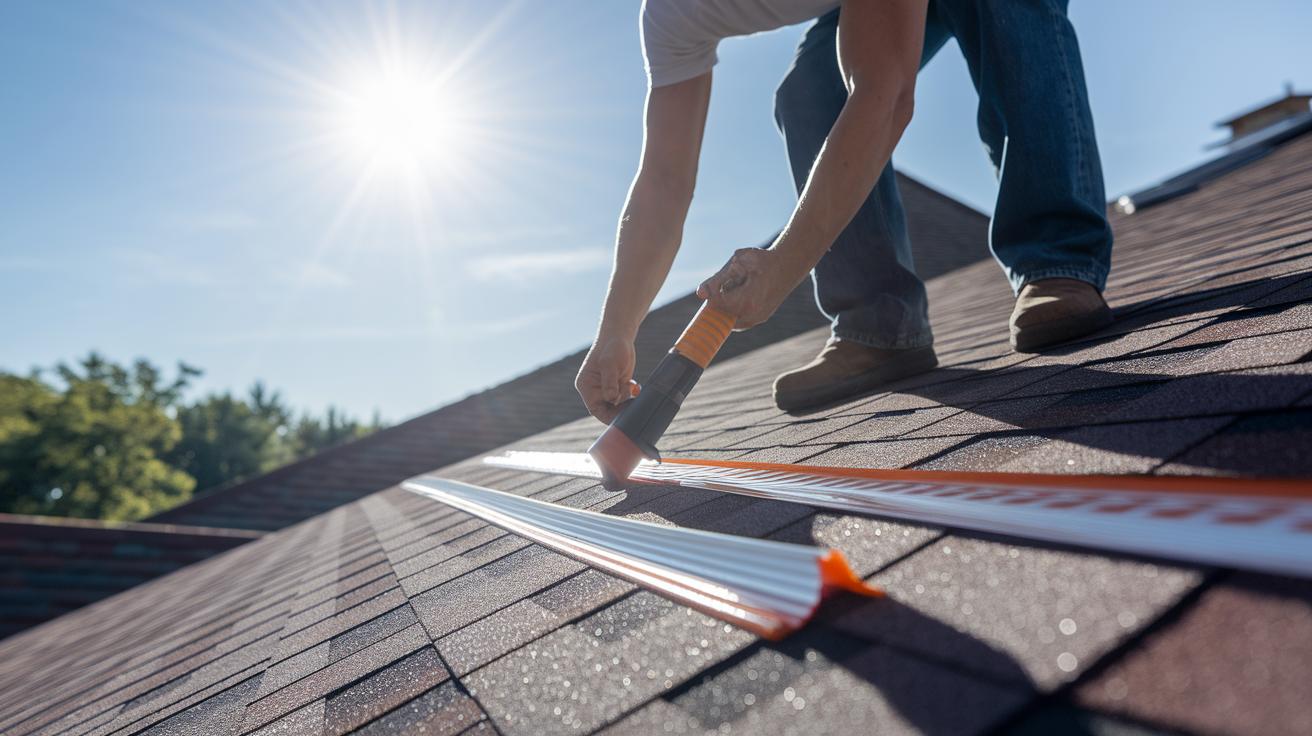
Step-by-Step Installation of Roof Repair Tape
Quick Fix:
• What: Seal a roof leak with repair tape
• Time: 30 min plus 24–48 hr cure
• Skill: Beginner
• Tools & Materials: Tape measure, utility knife, hand roller, gloves, eye protection, roof repair tape
• Cost: Around $10–$30
• Safety: Wear gloves and eye protection; avoid wet areas when working
- Measure the leak area with a tape measure. Mark the edge of the damage and add a 2-inch extra margin all around.
- Use your utility knife to cut the tape along the marks. Make your cuts neat so the extra 2-inch overlap stays even.
- Before you start, put on your gloves and eye protection to stay safe.
- Peel away the liner slowly. Center the tape over the leak so it covers the area and overlaps the edges.
- Press the tape firmly onto the roof. Use a hand roller starting from the middle and work your way out to push out any air bubbles.
- If you're using a self-fusing patch strip, wrap it around the seam and pull it tight as you press. This stretching makes the tape stick for a smooth fix.
- Let the tape cure for 24 to 48 hours. Keep the area free of standing water and heavy moisture so the bond sets fully.
Top Roof Repair Tape Brands and Product Comparison
When you need to fix a roof leak fast, knowing which tape to pick is key. Here are three top brands that work as waterproof patches and heavy-duty sealants. You can find them at Home Depot, Lowe’s, or Amazon.
People have given these tapes high marks for toughness and ease of use. One homeowner said, "I used Brand B after a heavy storm. Its UV resistant seal kept my roof dry all season." Each brand offers its own strengths to help you get the job done.
| Brand | Material & Type | Dimensions | Temperature Range | Key Features | Price |
|---|---|---|---|---|---|
| Brand A | Butyl rubber tape | 4″×60′ | 0°F–120°F (–18°C–49°C) | Puncture resistant | $25 |
| Brand B | Fiberglass-reinforced resin | 3″×50′ | –20°F–150°F (–29°C–66°C) | UV resistant | $30 |
| Brand C | Acrylic adhesive film | 2″×100′ | 0°F–150°F (–18°C–66°C) | Flexible, chemical resistant | $20 |
Use this guide to help you pick the right tape for your project. Check with local stores for patch kits, like the Home Depot patch kit or the Lowe's seal tape option, to find a product that fits your needs for durability and performance.
Troubleshooting and Maintenance Tips for Roof Repair Tape
Quick Fix:
- What: Reseal lifted roof tape edges
- Time: 10 min
- Skill: Beginner
- Tools & Materials: Clean rag, extra roof repair tape, water, ladder (if needed)
- Cost: Parts $3–$10
- Safety: Work on a stable ladder and watch your footing
- After heavy rain, check the tape edges to see if any parts are lifting.
- Use a clean rag to remove any trapped moisture. Make sure the area is dry before you move on.
- Press the tape firmly back down. Apply extra pressure to secure the repair.
- Let the surface dry completely before resealing to avoid trapping water.
- Replace any tape that has seen too much sun (UV rays) every 3–5 years to keep it strong.
- Inspect seams closely after storms. Even small gaps can let water in.
- Remember, roof repair tape is an emergency patch. It is not meant as a final fix for steep slopes or major damage.
Regular checks and proper upkeep will help keep your roof repair tape working longer and protect your roof from leaks.
When to Use Roof Repair Tape vs Hiring Professional Roofers
Quick Fix:
• What: Stop a small leak right away
• Time: 5–10 min
• Skill: Beginner-friendly
• Tools & Materials: Roof repair tape, scissors, clean cloth
• Cost: Under $40
• Safety: Work slowly and safely on the roof
- If you spot a small leak, grab your roof repair tape. Stick it on immediately to keep water out and stop further damage during a storm.
- Tape works best on minor, isolated trouble spots. You can patch these until you plan a long-term fix.
- A DIY tape kit is a smart money-saver for tiny issues that do not hurt the overall roof structure.
- When damage spreads over a big area or the decking is weak, your best bet is to call a pro. They will usually replace the flashing and add a full membrane to secure your roof. This kind of repair can cost $300 or more because it is a solid, lasting fix.
- Check your roof regularly so you can catch small leaks early. Use tape for quick fixes, and reach out to professionals when deeper, structural problems show up.
Final Words
In the action, we showed you how to choose and apply roof repair tape to fix leaks fast.
We broke down prepping the roof, comparing tape types, and installing the patch step by step.
We also covered troubleshooting tips and highlighted when a DIY fix is best over a full professional repair.
By following these clear, hands-on steps, you can seal leaks quickly, save money, and build useful skills.
Keep your repair projects safe and effective with trusted roof repair tape. Enjoy your handiwork!
FAQ
What does waterproof sealing tape for a roof do?
The waterproof sealing tape for roofs creates a durable, flexible seal that stops leaks quickly. It resists chemicals and extreme temperatures, making it perfect for emergency and temporary fixes.
What is the best roof repair tape for quick DIY fixes?
The best roof repair tape offers a strong, flexible adhesive in formats like butyl, acrylic, or fiberglass. It quickly seals leaks, works well in various temperatures, and helps you stop water damage fast.
Where can I find roof repair tape at stores like Home Depot and Lowe’s?
The roof repair tape is available at major retailers including Home Depot, Lowe’s, and Amazon. Leading brands offer options with butyl rubber, fiberglass reinforcement, or acrylic film to suit your repair needs.
What is ThermaCote Roof Repair Tape and can it be used on metal roofs?
The ThermaCote Roof Repair Tape is a thermal-resistant, waterproof patch designed to seal leaks effectively. It works well on metal roofs when the surface is properly cleaned and prepared before application.
What is roof seam tape and why is it useful?
The roof seam tape serves to seal the joints between roof panels. It creates a weatherproof barrier that guards against leaks, ensuring a more secure, long-lasting temporary repair.