
Quick Fix
• What: Build a stylish wood cross decoration
• Time: 45–60 min
• Skill: Beginner (basic measuring and cutting skills)
• Tools & Materials: Red Padauk wood, light Maple wood, tape measure, saw, wood glue, brush, Danish Oil
• Cost: Parts $10–$30
• Safety: Wear eye protection
- Pick your wood pieces. Choose a rich red Padauk and a lighter Maple for a cool mix of colors.
- Measure and cut your wood to size. Follow your plan to get the right shapes.
- Glue the pieces together. Apply wood glue (an adhesive that bonds wood) and hold each piece in place.
- Let the glue dry before moving your piece.
- Brush on Danish Oil evenly so the wood’s colors pop.
- Allow the finish to set. Enjoy your new decorative wood cross!
Clear and simple, this project shows how basic lumber can be turned into eye-catching art even if you’re new to woodworking. Have fun and be safe!
How to Make a Wood Cross Craft: Complete Step-by-Step Tutorial
Quick Fix:
• What: Build a laminated wood cross with a striking mix of Padauk's red tones and Maple’s light grain
• Time: 1 to 2 hours
• Skill: Beginner (you just need basic carpentry skills)
• Tools & Materials: Padauk wood, Maple wood, square, ruler, saw, exterior-grade wood glue, bar clamps, chisels or a saw, assorted sandpapers, Danish Oil finish
• Cost: Around $15–$30
• Safety: Wear eye protection; work carefully with sharp tools
-
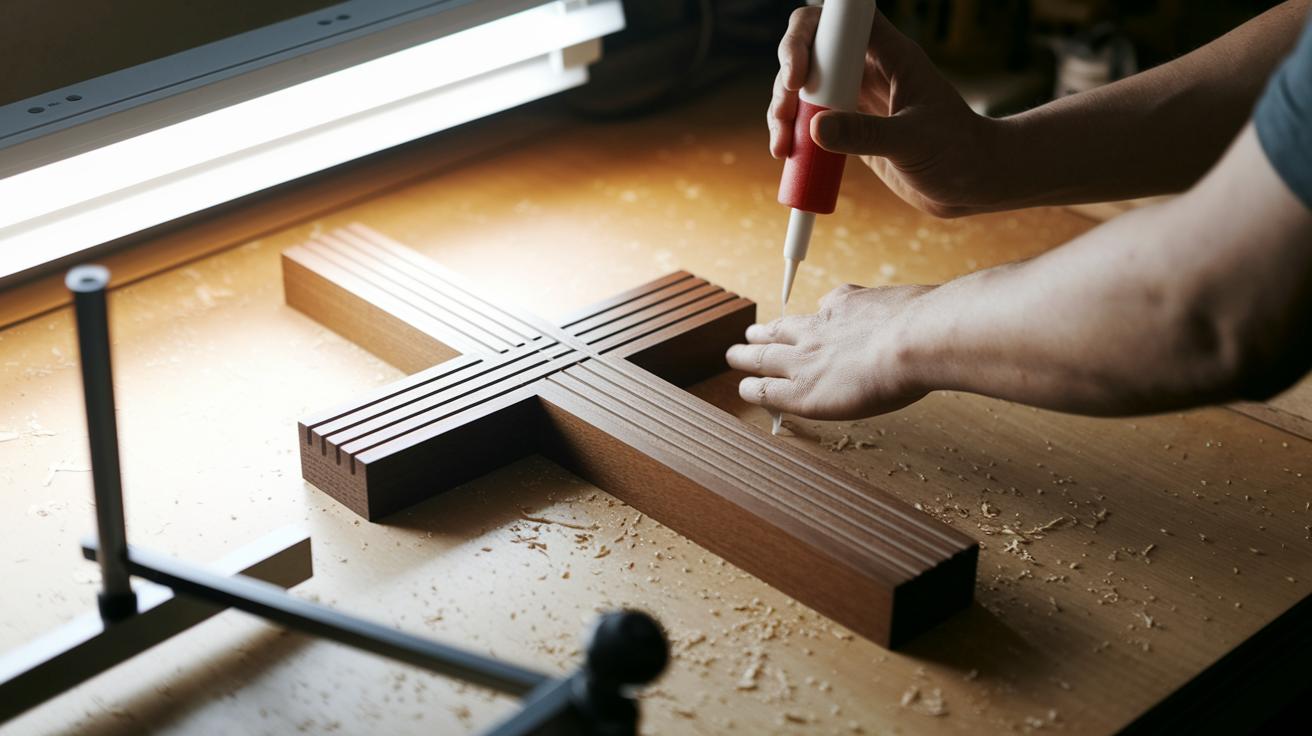
Measure and Cut Your Wood
Mark your Padauk and Maple strips to the sizes you need. Use a square to draw straight lines. For example, cut two pieces to 10 in (25.4 cm) and two pieces to 6 in (15.2 cm) for balance. -
Spread the Wood Glue
Evenly coat the edges where the pieces will join with a thin layer of exterior-grade wood glue. Work fast so the glue stays wet, avoid heavy blobs to keep clamping easy. -
Clamp the Pieces Together
Press the pieces using bar clamps. Check the alignment and then let the glue cure as recommended by the glue instructions. Make sure the edges meet neatly. -
Rough Out the Cross Shape
Take off the clamps. Use a chisel or saw to trim off any extra wood and shape your basic cross. Smooth any overhanging bits for an even look. -
Sand Down All Surfaces
Work through different grits of sandpaper to get the wood smooth. This prepares the wood for the finish while removing any rough spots. -
Apply Danish Oil Finish
Brush Danish Oil along the direction of the wood grain. Let the oil soak in, then wipe off any extra to reveal a clean, enhanced look.
You can scale the sizes up or down while keeping the proportions the same for your perfect cross.
Materials and Tools for Wood Cross Craft Tutorial

Pick out good supplies that will give your wood cross a strong build and a neat finish. Use Padauk for a rich red tone and Maple for a light, soft grain. A coat of Danish Oil brings out the wood's natural texture. If you're eco-minded, opt for reclaimed or eco-friendly wood to add a unique twist to your project while helping the planet. High-quality tools ensure your cuts stay accurate and you work safely. Here’s a simple checklist of what you need:
- Padauk lumber (for a bold color)
- Maple lumber (for a soft grain)
- Exterior-grade wood glue (for strong bonds)
- Danish Oil finish (to highlight the wood's texture)
- Measuring square (for perfect right angles)
- Miter saw (for straight cuts)
- Bar clamps (to hold parts securely)
- Chisel set (for detailed carving)
- Assorted sandpaper grits (from coarse to fine for a smooth finish)
- Safety gloves (to protect your hands)
- Eye protection (to shield your eyes)
- Pencil (for clear markings)
Selecting and Preparing Wood for Your Wood Cross Craft
Pick wood with different grain patterns so your cross looks tough and stylish. For example, Padauk gives a deep, rich color while Maple shows off a light, smooth grain. Make sure to line up the grain correctly to add strength and stability. Also, keep the same proportions if you change the size of your project. This way, your cross will have a balanced look and be strong enough for everyday use.
- Resaw to thickness – Cut your boards to the same thickness for a solid build.
- Joint board edges – Smooth the edges with a jointer so the pieces fit together snugly.
- Mark grain direction – Clearly mark the grain on each board to ensure proper alignment.
- Plane surfaces – Use a hand or electric planer to flatten the surfaces so the glue sticks evenly.
- Pre-sand with medium-grit paper – Start with medium-grit sandpaper to remove rough spots and set up a smooth finish.
Tip: For a budget-friendly and eco-smart choice, consider reclaimed elm or a piece of teak. These woods add unique charm, cut cost, and help the environment.
Assembling and Joining in Your Wood Cross Craft Tutorial
Quick Fix:
What: Build a strong wood cross
Time: 20 min
Skill: Intermediate woodworking
Tools & Materials: Wood pieces, exterior-grade wood glue, bar clamps, clean cloth
Safety: Wear gloves and work in a clear area
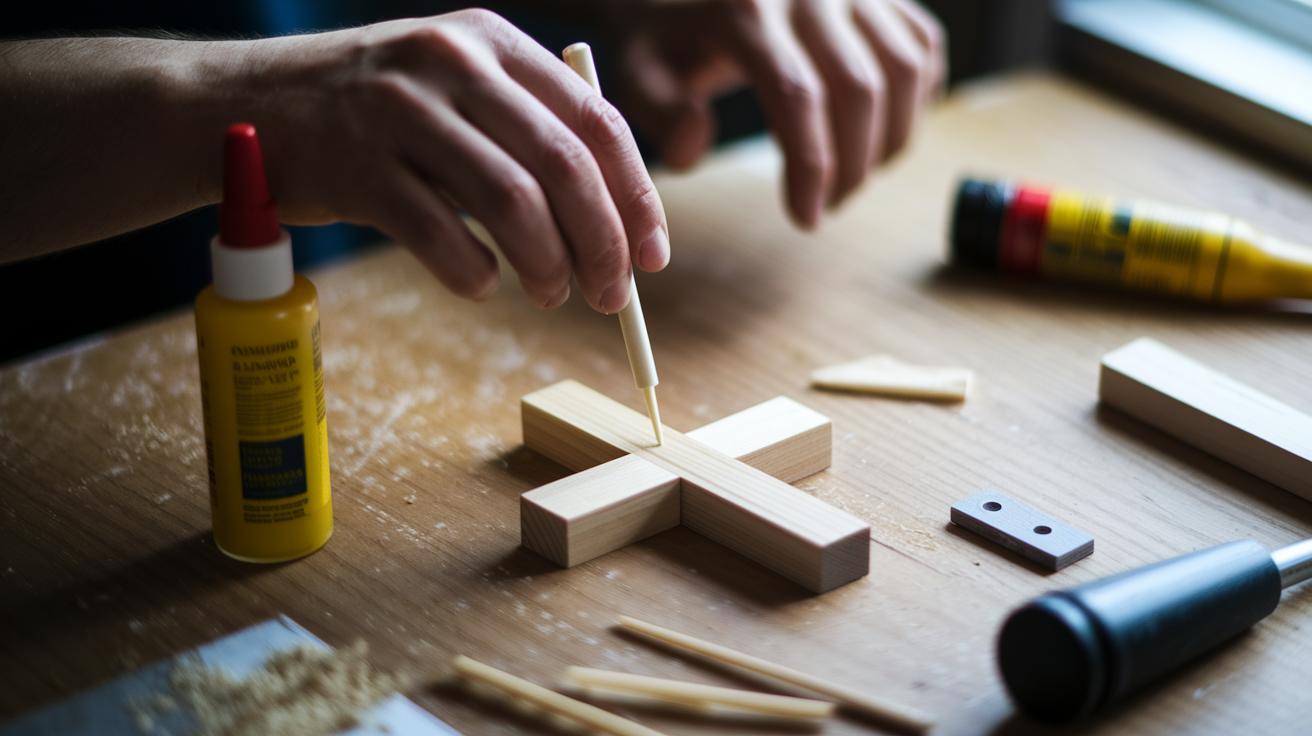
- Dry-fit all pieces to check that every corner makes a perfect right angle.
- Spread a thin layer of exterior-grade wood glue along each edge and wipe away any extra glue right away to keep the finish clean.
- Clamp the pieces together using bar clamps and hold steady until the glue fully cures.
Tip: Taking time to remove extra glue helps prevent marks on your surface.
Finishing and Customizing Your Wood Cross Craft
• Tape wrapping
• Yarn accents
• Paint crackle effect
• Carved patterns
• Metal accents
• Woodburning details
• Engravings
• Stain washes
Start by sanding all surfaces until they are smooth. This helps every finish and design stick properly. For a flawless result, check out tips on sanding wood crafts here: https://howdoi.org?p=1177.
- Wrap your cross with washi tape. Stick the tape neatly along the edges. For a bright, modern twist, try wrapping the arms with contrasting tape.
- Give the handle a rustic touch by wrapping it with yarn. Wrap the yarn tightly and evenly to create a comfortable grip with a handcrafted feel.
- For a unique crackled look, let your base coat dry, then spread on a thick crackle glaze. The glaze forms larger cracks that add texture and depth.
- Add a personal touch by carving simple patterns into the wood. Carving transforms your piece into a custom work of art.
Remember: a smooth surface is key to making your custom details last.
Cost, Time, and Troubleshooting for Your Wood Cross Craft Tutorial
Quick Fix:
What: Create a unique wood cross using offcuts, glue, and Danish Oil.
Time: 1–2 hours total (include drying time)
Skill: Beginner
Tools & Materials: Offcuts, glue, Danish Oil, washi tape, crackle glaze
Cost: Under $20
Safety: Keep your work area clean and wipe up spills right away
Steps:
- Gather your supplies and expect to spend less than $20.
- Plan for about 1–2 hours total, remembering that drying times are part of the process.
- Work on each decorative step (like wrapping with washi tape or adding a crackle glaze) in about 15–20 minutes chunks.
- Before gluing, line up each piece carefully to avoid misaligned joints.
- Wipe off any extra glue immediately with a clean cloth so it doesn’t leave marks.
- Spread the crackle glaze evenly and give it enough time to dry for a uniform look.
- Sand slowly using different grits to prevent surface scratches.
- Apply Danish Oil in thin coats to avoid blotches and keep your finish even.
Final Words
In the action, you gathered your woods, measured and prepped each piece, and assembled your cross with steady hands. You also fine-tuned details, from lamination to a smooth Danish Oil finish. Each step built on the last, showing that even a busy DIYer can craft a striking emblem. Enjoy the process and keep your workspace safe. You now have a complete wood cross craft tutorial to add to your handy collection of quick, effective fixes.
FAQ
Q: What does a wood cross craft tutorial step by step show?
The wood cross craft tutorial step by step shows how to measure, cut, laminate, shape, sand, and finish contrasting wood pieces. It arranges clear numbered instructions for a precise and easy build.
Q: How does a wood cross craft tutorial for beginners work?
A wood cross craft tutorial for beginners breaks down the process into simple tasks with basic tools and clear directions. It guides you through wood selection, cutting, and finishing without complex jargon.
Q: What do free wooden cross patterns or plans offer?
Free wooden cross patterns or plans provide downloadable PDF templates and precise layouts. They help you replicate the design with accurate proportions, making construction straightforward and accessible.
Q: How do you build a cross out of 4×4?
Building a cross out of 4×4 wood involves cutting the timber to appropriate sizes, dry fitting the pieces, gluing, clamping, and then sanding and finishing. The process ensures a solid structure with balanced proportions.
Q: How do you build a cross out of 2×4?
Building a cross out of 2×4 wood means adjusting cutting dimensions to suit smaller stock, dry fitting the parts, applying consistent glue, clamping the joints, and then sanding smoothly for a neat final touch.