
Quick Fix: Replace a Faulty Fuse Link
• What: Get your car starting normally
• Time: 20 min
• Skill: Basic DIY car care
• Tools & Materials: New fuse link, screwdriver, multimeter (a tool to check electrical flow)
• Cost: $5–$15
• Safety: Disconnect your battery before you begin
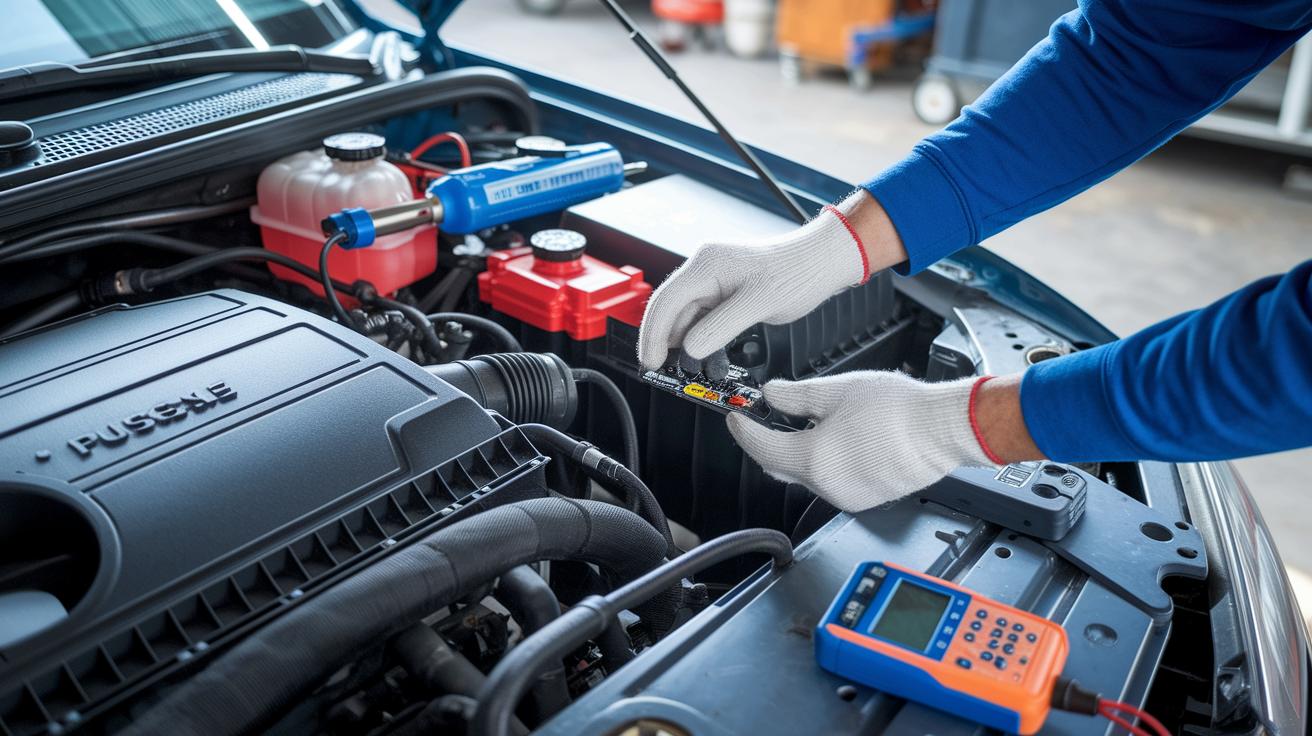
- Open the fuse box and find the fuse link.
- Look it over for any signs of damage or burn marks.
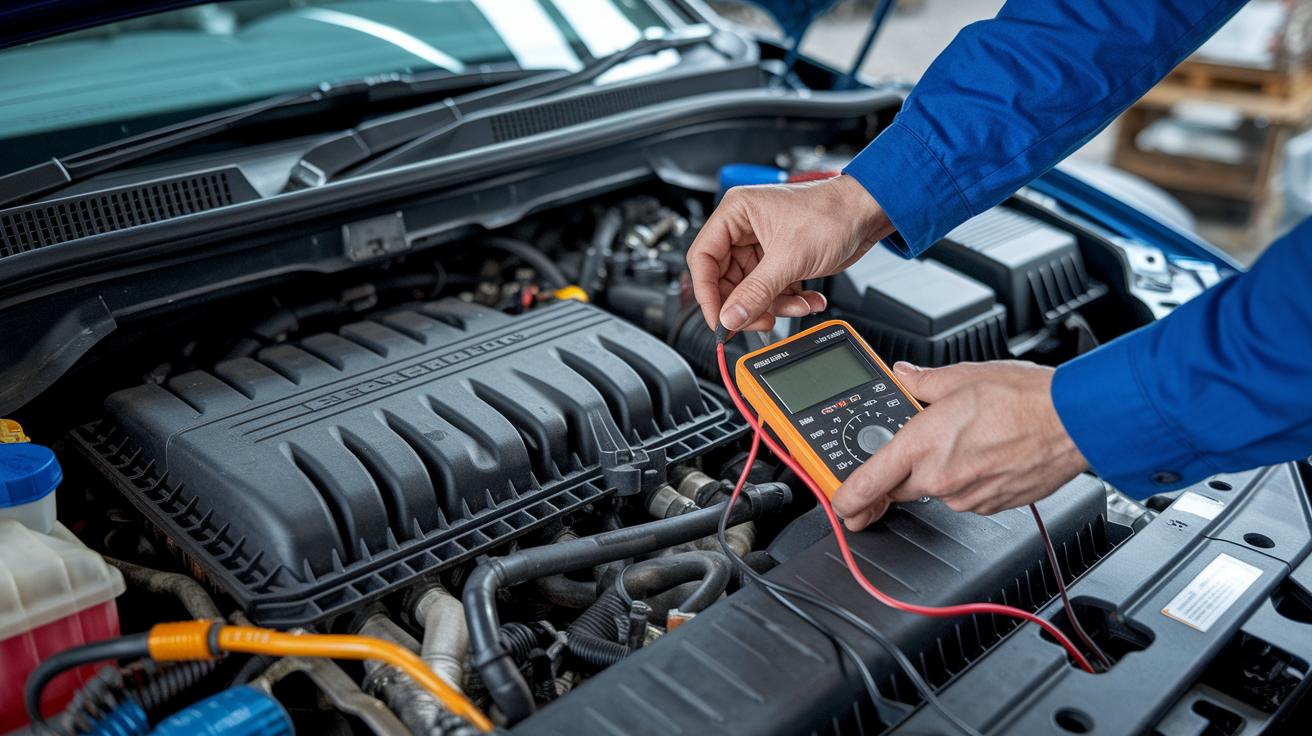
- Use a multimeter to check if it’s working properly.
- Remove the bad fuse link, then snap in a new one.
- Reconnect the battery and start your car to test it.
If your car cranks but does not start, a blown fuse link might be to blame. This part acts like a safety valve that stops strong electrical surges from harming your car’s circuits. When it blows, you risk sudden breakdowns and extra repair costs. These simple steps help you keep your car running safe and smooth.
Understanding Fuse Links and When to Replace
A fuse link is a special wire found in high-current car circuits, like the alternator and starter. It works like a built-in safety feature by melting when too much current flows through. In other words, it protects your wiring by sacrificing itself when there’s an overload. Unlike regular fuses that fit into a fuse holder, a fuse link can handle more amperage.
If a fuse link fails, you might notice your engine cranks but won’t start, or your dashboard lights may fade. Here’s how to check and what to do:
- Look for signs of damage. You might see burnt insulation or charred spots along the wire.
- Use a multimeter (a tool that measures electrical current) to check continuity. If the reading is off, the fuse link is not working.
- Note any irregular voltage or sudden loss of power in the circuit. These can be clues that the fuse link has blown.
When you decide to replace a fuse link, be sure to match the original’s amperage rating and wire gauge. Using the correct replacement will keep your vehicle’s electrical system safe and reliable.
Essential Safety Precautions and Tools for Fuse Link Replacement
Quick Fix:
- What: Replace your vehicle's fuse link safely.
- Time: 20–30 min.
- Skill: Beginner to intermediate, just follow these steps.
- Tools & Materials: Digital multimeter, insulated gloves, safety glasses, automotive wire strippers and crimpers, heat-shrink tubing, heat gun, and a replacement fuse link with the correct amperage.
- Cost: About $20.
- Safety: Disconnect the battery and confirm there’s zero voltage before you start.
- Disconnect your vehicle’s negative battery terminal. This stops any power from flowing.
- Put on your insulated gloves and safety glasses to protect you from sparks.
- Use your digital multimeter to check the fuse link area. Touch the probes on each side, and make sure the meter shows 0 V. This confirms the circuit is off.
- Gather your tools: the digital multimeter (for voltage and continuity checks), wire strippers and crimpers (for clear cuts), and heat-shrink tubing with a heat gun (to cover splices). Also, have your replacement fuse link ready.
- Do a second check with the multimeter to be absolutely sure there’s no live current. This extra step avoids any accidents.
- Once you replace the fuse link, test the battery and alternator signals to see that the circuit is working normally.
- Always work in a clear, well-lit space for the best results.
Key steps to remember:
- Disconnect the battery.
- Wear your safety gear.
- Test for zero voltage.
- Have all the right tools at hand.
fuse link replacement: Easy steps for safe fixes
Quick Fix:
• What: Replace a bad fuse link safely
• Time: 20 min
• Skill: Beginner
• Tools & Materials: Digital multimeter, wire cutters, wire stripper, soldering iron or crimper, heat-shrink tubing, heat gun, torque wrench
• Cost: ~$5–$15
• Safety: Always disconnect the negative battery cable first
- Turn off power by disconnecting the negative battery cable. Use your digital multimeter to check there’s no live current.
- Find the fusible link in the main harness. Look near the fuse block or the starter cable and work where you have good light.
- Check the link with your multimeter. Place the probes on each side. A 0 V reading means the link is open (bad).
- Remove the damaged link using automotive wire cutters. Leave enough wire on both sides to make a strong splice.
- Strip about 1/4 in (6 mm) of insulation from each wire end with a wire stripper.
- Fit a new fusible link that matches the original’s amperage and wire gauge. Align the wire ends just like before.
- Secure the connection by crimping or soldering the splice. If you solder, allow about 30 seconds for the joint to cool.
- Slip heat-shrink tubing over the splice and use a heat gun to apply even heat. This seals and insulates the joint.
- Reconnect the negative battery cable. Tighten the terminals to the manufacturer’s torque specifications using a torque wrench.
- Make sure the wires follow their original path and are not rubbing against hot surfaces or moving parts.
Testing and Troubleshooting After Fuse Link Replacement
Quick Fix:
• What: Confirm your fuse link and wiring work correctly.
• Time: 30 min
• Skill: Basic electrical work
• Tools & materials: Digital multimeter, fuse link, insulated tools
• Cost: Parts cost is low
• Safety: Turn off power and let the engine cool before you touch anything
- Turn off the power and set your digital multimeter to measure resistance (ohms). Put the probes on each side of the new fuse link. The reading should be almost 0 ohms. If it shows more than 0.2 ohms, you may have a bad connection.
- Start the engine so the circuit gets power. Now, set your multimeter to check the voltage drop. Place the probes on the splice and look for a drop under 0.2 V. A reading like 0.25 V means extra resistance, so you might need to re-insulate or fix the splice.
- Take a short drive and then, once the car cools a bit, feel around the splice for any hot spots. If you notice any persistent warmth, it could mean a loose crimp or solder joint.
- If you still have issues, try more advanced checks. Test the alternator output using battery-alternator signal protocols and look for any unwanted power drain by following a step-by-step diagnostic method.
Choosing the Correct Fuse Link and Wire Gauge for Your Vehicle
Quick Fix:
• What: Pick the right fuse link and wire gauge
• Time: 10 min
• Skill: Beginner
• Tools & materials: Vehicle manual, fuse link specs
• Cost: $0–$20
• Safety: Disconnect the battery before you inspect electrical parts
-
Check your vehicle manual to find the correct fuse link rating. You’ll likely see numbers like 100 A, 150 A, or 200 A. Matching this rating stops overheating and keeps your system safe.
-
Choose a fuse link with a rating that fits your car’s original specs. Using the exact rating is key to avoiding electrical issues.
-
Select the right wire gauge based on how much current the circuit uses. A 12 AWG wire works well for circuits using up to 20 A. For heavy-duty circuits, such as alternators or starters that need 60–150 A, go with a thicker 4 AWG wire.
-
When buying a new fuse link, make sure it meets the proper temperature and insulation standards listed in your manual. This keeps your fuse working well even when the current is high.
-
Look for products with durability certifications and warranty support. Certified parts are built to last and handle daily wear, giving you both safety now and long-term reliability.
Remember, following your vehicle’s specs is the best way to keep your electrical system running smoothly.
Final Words
In the action, we broke down how to inspect and tweak a fusible link. We covered fuse link replacement steps, safety checks, and testing with a multimeter. You learned the proper precautions and the right tools to change a damaged link safely. Each step makes it clear and doable, from cutting out the faulty section to confirming a secure splice. With these quick fixes and smart tips, you can tackle your own fuse link replacement and get your vehicle back on track with confidence.
FAQ
Where can I get a car fuse link replacement near me?
Searching for fuse link replacement near you means checking local auto repair shops, dealership service centers, or retailers like AutoZone that offer both parts and service.
What are the options for fuse link replacement on Toyota, Ford, and Chevy vehicles?
Fuse link replacement for Toyota, Ford, and Chevy involves using parts that match OEM specs and getting services from dealerships or specialized auto suppliers for high-current circuits.
What happens when a fusible link goes out?
A fusible link going out means it has blown to create an open circuit, cutting off power to critical systems and preventing further damage by melting during an electrical overload.
Are fusible links replaceable?
Fusible links are replaceable by removing the damaged segment and splicing in a new one with matching amperage; proper safety steps and the correct tools are essential during the process.
What can I use instead of a fusible link?
Instead of a fusible link, you might use an inline fuse or circuit breaker rated for similar high-current applications, though following manufacturer guidelines is best for safe operation.
How often should a fusible link be replaced?
Fusible links are typically replaced only after they have blown; regular inspections help identify any damage early, so you only replace them when a failure or significant wear is detected.
How much does fusible link replacement cost?
Fusible link replacement cost varies by vehicle and labor, ranging from low-cost DIY fixes with inexpensive parts to higher charges at professional repair centers.