
Quick Fix: Turn Old Tin Cans into Chic Home Decor
Time: 30–60 min per project
Skill: Beginner
Tools & Materials: Tin cans, soap, water, sandpaper, paint or other finishes
Cost: Low ($1–$5 per can)
Safety: Wear gloves and eye protection while cleaning and sanding
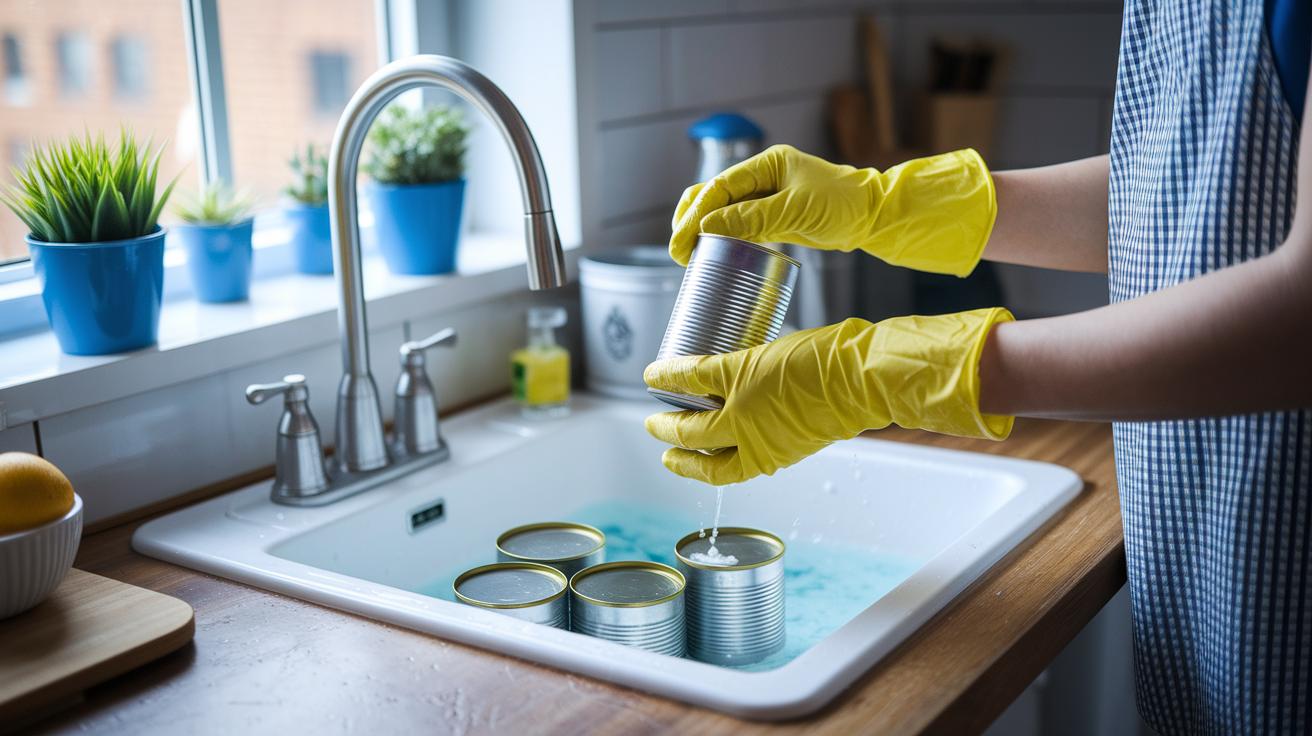
- Start by cleaning the tin can with soap and water to remove any residue.
- Sand the surface lightly to smooth out rough edges.
- Get creative by painting the can, adding patterns, or turning it into a planter, storage container, or even a quirky light fixture.
- Display your finished piece to brighten your home and cut down on waste.
Transforming a used tin can into a stylish décor piece is an easy, low-cost project. With just a little work, you can give these everyday items a second life and add a unique touch to your space. Enjoy the process and let your creativity shine!
Creative Tin Can Upcycle Ideas That Transform Everyday Cans
Tin cans are perfect for your next DIY project. They cost little, are easy to find, and work great as the base for many creative ideas. With some cleaning, a bit of sanding, and a spark of creativity, you can transform these simple cans into attractive and useful pieces for your home and garden.
• Home décor accents
• Garden planters and hanging pots
• Lighting fixtures and lanterns
• Storage and organization solutions
• Holiday and seasonal decorations
• Crafts for kids
These projects show that upcycling tin cans isn’t just a money-saver, it’s a fun way to add your own style to your space. For example, you can cover a plain soup can with layers of decorative paper to create a charming vase or turn a coffee can into a mini herb garden by drilling a few drainage holes. The process is easy to adjust, whether you prefer a modern look or a more relaxed boho style. You can change up the size, color, and design with basic tools and supplies, making these ideas great for beginners and seasoned DIYers alike.
Using tin cans for projects is also eco-friendly. Not only do you cut down on waste, but you also get a unique touch to your décor and garden work. With so many ideas on hand, feel free to mix and match designs or even start your own creative experiments to turn everyday cans into inspiring DIY delights.
Preparing and Safely Prepping Tin Cans for Upcycle Projects
Quick Fix:
• What: Clean and smooth tin cans for crafts
• Time: 20 min
• Skill: Beginner
• Tools & Materials: Dish soap, warm water, scrub brush, medium- and fine-grit sandpaper, tin snips, metal file, protective gloves, safety glasses
• Cost: Mostly household items
• Safety: Wear gloves and safety glasses; work in a ventilated area
- Wash the tin cans in warm, soapy water. This removes food bits and loosens stickers and grease.
- Scrub off any stickers and rinse off all soap. Let your cans dry completely before you start the next steps.
- Look for rust marks. Use medium-grit sandpaper to gently sand away rust and flaky spots. This makes the surface smooth for your project.
- When cutting or opening cans (for lanterns and other crafty items), use tin snips. Then, use a metal file to round off any sharp rims.
- Smooth the edges by sanding with fine-grit sandpaper to prevent cuts.
- Always wear protective gloves and safety glasses when handling metal edges.
- Set up a stable workspace with good lighting and ventilation. Keep your tin snips, metal files, and sandpaper handy in one spot.
- Dispose of scrap metal safely by recycling it at your local facility.
Tin Can Upcycle Ideas for Home Décor
Painted Découpage Vase
Quick Fix:
• What: Turn an old can into a decorative vase
• Time: 30 min
• Skill: Beginner
• Tools & Materials: Tin can, warm soapy water, towel, primer, decorative paper or napkins, glue brush, clear sealer
• Safety: Work in a well-ventilated area and use gloves when handling glue
- Wash the can well with warm, soapy water to get rid of any dirt or oil.
- Dry the can completely with a towel.
- Brush on a light coat of primer so the design sticks well.
- Use your glue brush to dab decorative paper or a napkin onto the can.
- Let each layer dry before adding the next so you build up color and texture.
- Cover the final design with a clear sealer to protect it and add a gentle shine.
This project transforms a basic tin can into a creative centerpiece for any room.
Kitchen Utensil & Desk Organizer
Quick Fix:
• What: Create a handy organizer for utensils or office supplies
• Time: 20 min
• Skill: Beginner
• Tools & Materials: Empty tin can, drill, chalk-paint, adhesive pad or strong glue, labels or stencils
• Safety: Drill carefully and wear safety glasses
- Start with an empty tin can and, if needed, drill small drainage holes for kitchen or plant use.
- Secure the base with a sturdy adhesive pad so it stays in place on your countertop or desk.
- Paint the can with chalk-paint for a smooth and stylish finish.
- Add hand-written labels or lightly stencil patterns to personalize your organizer.
This project gives you a practical item that keeps your space tidy while adding a creative touch.
Fabric-Wrapped Boho Canisters
Quick Fix:
• What: Make a stylish, boho-style container
• Time: 25 min
• Skill: Beginner
• Tools & Materials: Tin can, fabric strips, hot glue gun or Mod Podge, optional tassels or beads
• Safety: Be cautious with hot glue
- Measure and cut fabric strips so they wrap evenly around the can.
- Use hot glue or a generous layer of Mod Podge to stick the fabric onto the surface.
- Smooth the fabric as you go to remove any wrinkles, and secure it at the seams.
- For extra flair, attach tassels or beads around the opening to bolster the boho look.
This method lets you customize your can to store small items, giving your decor a personal and artistic twist.
Feel free to mix colors, paper textures, and fabric patterns as you like. Experimenting with different materials helps you create art that truly suits your style.
Garden and Outdoor Tin Can Planter & Decor Projects
Quick Fix:
• What: Turn tin cans into fun garden planters or wall hangings
• Time: 30–60 min per project
• Skill: Beginner
• Tools & Materials: Tin cans, drill, tin snips, metal file, paint, hooks or brackets, small shovel, lightweight soil, plants (herbs or succulents)
• Cost: $5–$20 per project
• Safety: Wear gloves and eye protection when cutting or drilling
-
Make a Simple Tin Can Planter
- Pick a clean tin can.
- Drill 3–4 drainage holes (about 1/4 in / 6 mm each) in the bottom.
- Paint the can with weather-resistant paint for a bright look.
- Fill it with a lightweight soil mix and add your small plants or herbs.
-
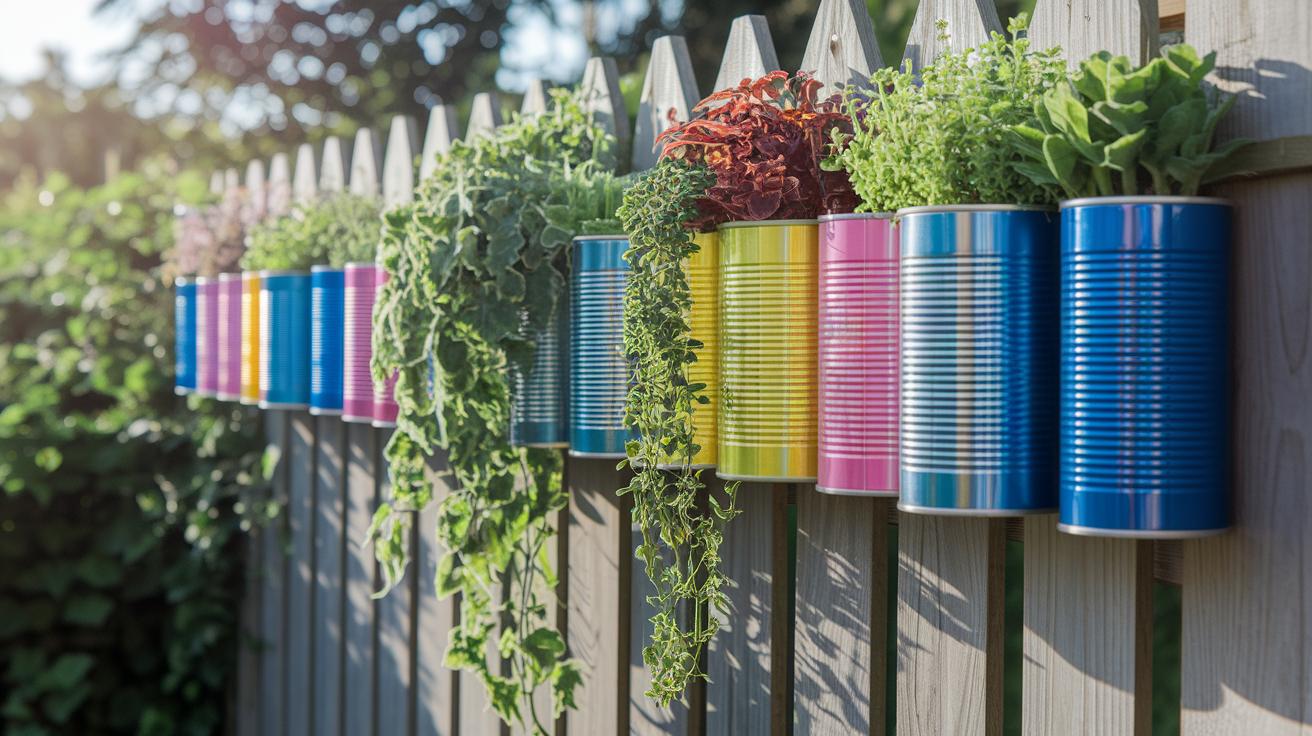
Build Hanging Planters and Wall Pockets
- Use tin snips to cut your tin can into planned shapes.
- Smooth the edges with a metal file.
- Attach sturdy hooks or brackets to the can.
- Hang them on a sunny fence or wall and fill with soil and small plants.
- For best results, choose herbs or succulents that work well in confined spaces.
-
Create a Tiered, Layered Garden Display
- Stack different-sized tin cans to build a layered look.
- Carefully cut decorative designs in the cans.
- Insert LED candles or solar-powered lights for a warm evening glow.
- Secure the stack by checking for any loose parts.
- Fill each tier with soil and your favorite small plants.
Tips:
• Use weather-resistant sealant on painted surfaces for extra durability.
• Check for rust and tighten or replace any loose hardware as needed.
• A small drill or shovel can make planting and assembling faster.
Enjoy your new garden project and have fun creating a unique outdoor space with these simple tin can ideas!
Tin Can Lanterns, Wind Chimes, and Seasonal Decor Ideas
Quick Fix:
• What: Create festive outdoor decor using tin cans
• Time: 30–60 min
• Skill: Beginner
• Tools & Materials: Tin cans, metal punch, chains or strong rope, LED or battery-operated candle, weatherproof sealant, paint
• Safety: Wear safety goggles and use sturdy hanging hardware
-
Make Tin Can Lanterns
a. Use a metal punch tool to create simple designs like stars or basic shapes on your tin cans.
b. Thread a loop at the top of each can so you can hang them from a beam or bracket.
c. Place a small LED or battery-powered candle inside for a soft, glowing effect. -
Build Tin Can Wind Chimes
a. Link several tin cans using chains or strong rope.
b. Add a small clapper, such as a metal washer or bead, inside one can to produce gentle sounds when the wind blows.
c. Paint the cans with a finish that fits your space, try rustic chalk-paint or bright enamel for extra pop. -
Enjoy Seasonal Variations
a. Cut out different shapes for each season, snowflakes for winter, leaves for autumn, or even a fun themed design for special days like May the 4th.
b. Use weather-resistant sealant and secure hanging hardware to keep your projects safe outdoors.
c. Choose LED candles to keep your new fixtures energy-efficient and secure.
Painting, Finishing, and Styling Your Upcycled Tin Can Creations
Quick Fix:
• What: Transform a tin can into a colorful, stylish decor piece
• Time: 45 min
• Skill: Beginner/Intermediate
• Tools & Materials: Tin can, fine-grit sandpaper (around 220 grit), acrylic or chalk paint, primer, stencils or washi tape, fabric or jute strips, clear coat
• Safety: Work in a well-ventilated area and wear gloves
-
Pick your paint and prep the can.
- Decide between bright acrylic paint or chalk-paint for a vintage look.
- Clean your tin can well and gently sand it with fine-grit sandpaper to even out rough spots for better primer adhesion.
-
Prime the surface.
- Brush on a thin coat of primer to fill in uneven patches and give your paint a solid base.
- Allow the primer to dry completely.
-
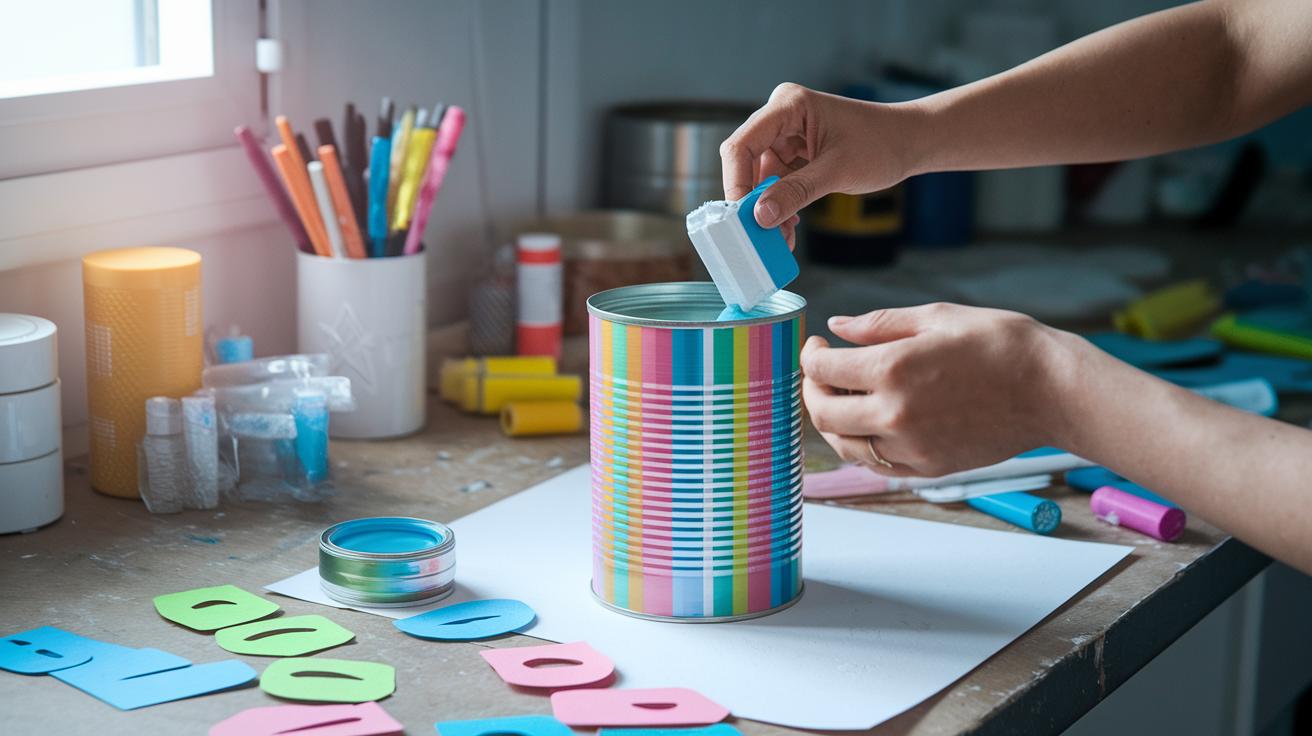
Add your creative touches.
- Use stencils, washi tape, or fabric wraps to add details.
- Try wrapping fabric strips or adding a bit of jute for a textured look.
-
Seal your design.
- Once your decoration is set, spray or brush on a clear coat to prevent chipping.
- Mix bold shades for a modern feel or choose soft, muted tones for a vintage style. Tailor your colors to suit your personal flair.
Enjoy your unique upcycled art project!
Final Words
In the action, you turned tin cans into creative projects that brighten home spaces and outdoor areas. The guide walked through transforming everyday cans into eye-catching décor, clever garden planters, fun lanterns, and more. It also showed proper cleaning, safe prepping, and stylish finishes.
Key projects include:
• Home décor accents
• Garden planters
• Lighting & lanterns
• Storage solutions
• Seasonal decorations
• Kid-friendly crafts
These tin can upcycle ideas make crafting fun, cost-saving, and eco-friendly. Enjoy your creative next steps!
FAQ
What tin can upcycle ideas can be sold?
The tin can upcycle ideas you sell combine style with practicality. They include decorative home accents, unique garden planters, and artistic organizers that are attractive to buyers and highlight eco-friendly creativity.
What tin can upcycle ideas work well for kids?
The tin can upcycle ideas for kids offer safe, fun projects like painted lanterns, craft organizers, and simple ornaments. These ideas let youngsters explore creativity while using simple, hands-on steps.
What tin can upcycle ideas suit adults?
The tin can upcycle ideas for adults focus on chic home décor and smart storage solutions. They include stylish planters, modern organizers, and artistic accents that add a fresh look to living spaces.
What recycled tin can craft ideas are available?
The recycled tin can craft ideas transform old cans into practical items such as vases, wind chimes, and solar lanterns. Each project adds functionality and a creative touch to your home or garden.
What can you make out of old tin cans?
What you can make out of old tin cans ranges from home décor to storage pieces. Projects include planters, lanterns, utensil holders, and even seasonal decorations, making them versatile for any room or garden.
What paint sticks best to tin cans?
The answer to what paint sticks to tin cans is that you should use a primer followed by acrylic paints. These adhere well to metal surfaces when cans are properly cleaned, sanded, and prepped beforehand.
What tin can decoration ideas can brighten a space?
The tin can decoration ideas brighten a space by transforming cans into painted vases, fabric-wrapped canisters, or seasonal lanterns. Each design brings a unique, eco-friendly charm to any area.
How can I reuse tin cans in multiple ways?
How you reuse tin cans includes over 35 ideas that cover home décor, garden planters, lighting, organizers, and seasonal accents. Each idea is budget-friendly, eco-conscious, and perfect for creative projects.