
Quick Fix: Brighten Your Garden with Tin Can Art
• Outcome: Turn old tin cans into fun garden decor.
• Time: 30 min
• Skill: Beginner
• Tools & Materials: Used tin cans, soap and water, a brush, paint, simple tools (like a nail and hammer), glue or wire.
• Safety: Wear work gloves and be careful with sharp edges.
- Clean the cans. Wash them with soap and water to remove any dirt.
- Dry the cans well. Leaving moisture can make the paint run.
- Paint the cans. Choose bright colors to add a personal touch. Let the paint dry.
- Decorate. Turn your cans into planters by adding small rocks and soil for flowers, or hang them to make a lantern or wind chime.
- Enjoy your garden. Place your new art pieces outside and admire your handiwork while cutting waste.
Using old tin cans in this way is easy and budget-friendly. With just a little cleaning, some paint, and a few basic tools, you can add unique style to your outdoor space while helping the environment.
Top Eco-Friendly Garden Decor Projects with Upcycled Tin Cans
Quick Fix:
• What: Turn used tin cans into cool garden decor
• Time: 30–60 min per project
• Skill: Beginner
• Tools & materials: Tin cans (coffee, olive oil, soup, etc.), gloves, mild detergent, paint and foam brush (optional), hammer and nail (for patterns), twine, chalk or markers
• Cost: $0–$15
• Safety: Work outdoors and wear gloves to protect your hands
Reusing tin cans cuts down on waste and adds a unique touch to your garden. You can use almost any tin can and give it a fresh look. Washing out the cans and stripping off labels is all you need to start. Working outside keeps you safe from strong-smelling paints, like gold leaf paint.
-
Herb Planters:
- Wash the can and remove any old labels.
- Fill with soil and plant your favorite herbs.
-
Succulent Pots:
- Choose tin cans in different sizes.
- Use them as mini pots for succulents to brighten any garden corner.
-
Flower Vases:
- Clean a tin can and apply a stripe of gold using a foam brush
- Use the can to hold fresh cut flowers.
-
Lanterns:
- Use a hammer and nail to make pattern holes on the can.
- Place a small tealight inside to enjoy a gentle glow at night.
-
Wind Chimes:
- Tie several cans together with twine.
- Hang the creation where the wind can make a pleasant sound.
-
Bird Feeders:
- Cut an opening in the side of a tin can.
- Fill with birdseed and hang it to invite feathered friends.
-
Garden Markers:
- Paint or write the name of each plant on a cleaned can.
- Place them in the garden to help label your beds.
Each of these projects is fun and simple to do on a weekend. You get to add a personal, eco-friendly touch to your space by turning everyday items into stylish and useful garden accessories. Enjoy crafting and making your garden a little greener!
Preparing and Protecting Tin Cans for Garden Use

Quick Fix:
• What: Turn old tin cans into safe garden planters
• Time: 20 min
• Skill: Beginner
• Tools & Materials: Warm, soapy water; drill with a small bit; sandpaper; painter’s tape (optional); gloves
• Safety: Work outside and wear gloves to protect your hands
- Rinse each tin can with warm, soapy water to wash away dirt and grease.
- Remove any labels and sticky residue to ensure a clean surface.
- Drill small holes along the can's ridges so excess water can drain out.
- Sand all sharp edges until smooth; this helps avoid cuts and stops rust from forming.
- If you plan to add designs later, stick on painter’s tape in your chosen pattern.
- Always wear gloves and work outdoors, especially when using strong-smelling paints or handling sharp metal.
Follow these steps to make sturdy and attractive tin can planters that keep your garden safe and stylish.
Transforming Cans into Decorative Planters with Paint and Textures
Quick Fix
• What: Turn a plain tin can into a decorative planter
• Time: 30 min
• Skill: Beginner (basic painting and upcycling)
• Tools & Materials: Tin can, gold leaf paint, spray or chalk paint, painter’s tape, foam brush, gloves
• Cost: Parts $3–$10
• Safety: Wear gloves and work outside for proper ventilation
- Pick a design that fits your garden, rustic charm or a modern twist.
- Choose your colors and textures. You can add a gold leaf stripe for a warm touch.
- Use painter’s tape to keep lines neat when painting.
- Get creative with labels by using chalkboard paint for a personal message.
- Enjoy the process and experiment with different textures to make your planter unique.
| Technique | Materials/Tools |
|---|---|
| Striped Gold Leaf | Gold leaf paint, foam brush |
| Clean Tape Lines | Painter’s tape, spray paint |
| Chalkboard Labels | Chalk paint, brush |
| Decoupage Designs | Mod Podge, decorative paper |
Mixing a bit of rustic decor with modern style gives your garden a look that is both fresh and timeless. A gold leaf stripe along the natural ridges of the can delivers an elegant finish. Always remember to wear your gloves and work outdoors to stay safe from strong fumes. Enjoy the upcycling journey and the unique planter you create!
Crafting Tin Can Lanterns for Perfect Garden Lighting

Quick Fix:
• What: Make tin can lanterns to light up your garden at night.
• Time: 30–45 min
• Skill: Beginner – no special skills needed
• Tools & materials: Tin can, hammer, nail, paper, outdoor paint (optional), tealight or LED light
• Cost: $5–$15
• Safety: Wear gloves and clear the work area of loose metal bits
- Choose a design by sketching simple shapes on paper. A row of small circles, like stars, works great.
- Draw your pattern on paper to show where you want the holes.
- Use a hammer and nail to punch holes along your drawn lines.
- Remove any sharp edges or metal shavings so the can is safe to handle.
- For extra style and weather protection, brush a light coat of outdoor paint over the can.
- Place a tealight or LED inside the can and test the glow at dusk.
Switch up your design for different seasons by swapping your pattern for holiday shapes like pumpkins or starbursts.
Crafting Unique Upcycled Tin Can Accessories
Quick Fix:
• What: Create stylish garden accessories using repurposed tin cans
• Time: 30–60 min per project
• Skill: Beginner to Intermediate (basic cutting and mounting)
• Tools & Materials: Tall tin cans, waterproof marker, plastic funnel, handle, utility knife, cleaning supplies, mounting hardware
• Cost: Low-cost, usually under $5 per accessory
• Safety: Wear gloves and eye protection when cutting metal
Steps to Make Your Projects:
-
Tin Can Rain Gauge
- Clean a tall tin can well.
- Use a waterproof marker to draw clear measurement lines.
- Place the can in an open area so rain fills it accurately.
-
Funnel Attachment
- Trim a plastic funnel to the right size.
- Secure it on top of the rain gauge to keep debris out while directing rain in.
-
Tin Can Caddy
- Cut a slot in the side of a tin can with your utility knife.
- Attach a sturdy handle to make it easy to carry.
- Mount the caddy on a wall or fence for storing small hand tools.
-
Multi-Compartment Upgrade
- Combine two tin cans using an internal divider.
- This design lets you separate seed packets, small tools, or other garden items.
-
More Ideas
- For projects like tin can wind chimes, bird feeders, or garden markers, check out additional eco-friendly guides for full instructions.
Set Up Your Space:
Place the rain gauge in a spot where it gets full exposure to rain. Hang the caddy near your garden workspace for quick access to your tools. This simple plan keeps clutter at bay while adding a creative, eco-friendly touch to your outdoor area.
Seasonal Themes and Festive Upcycled Tin Can Garden Decor

Quick Fix:
• What: Transform old tin cans into festive garden decor for each holiday.
• Time: 30–60 min per project
• Skill: Beginner – simple cleaning, painting, and light crafting
• Tools & Materials: Tin cans, soap, water, paint (colors vary), brushes, nail, hammer, scissors, LED candle or small candle
• Cost: Parts $2–$15
• Safety: Wear gloves and work on a stable surface
-
Valentine’s Day Flower Vases
Clean out the tin cans and remove any labels. Paint them with soft red or add a touch of gold for a warm, romantic look. Use these as vases for fresh flowers to brighten your garden on Valentine’s Day. -
July 4th Star-Spangled Lanterns
Give your cans a patriotic makeover by painting them red, white, and blue. Use a nail and hammer to make pattern holes in the metal. When you place a small light inside, the lantern glows brightly at dusk for an eye-catching Fourth of July display. -
Halloween Jack-O’-Lantern Cans
Cut fun face designs into the cans and paint them in vivid orange with black details. These playful jack-o’-lanterns add a spooky and creative twist to your garden, perfect for a Halloween celebration. -
Christmas Candle Containers
Decorate tin cans with frosty patterns or festive symbols. Set a small candle or LED light inside to create a cozy winter glow. These containers make a cheerful addition to your garden during the holiday season.
With these simple steps, you can easily transform everyday tin cans into charming, seasonal art for your outdoor space. Enjoy crafting and adding a festive touch to your garden!
Weatherproofing and Maintaining Outdoor Tin Can Creations
Quick Fix:
• What: Protect your tin can art from weather damage.
• Time: 10 min setup, plus drying.
• Skill: Beginner
• Tools & Materials: Outdoor clear sealant or spray varnish, rust-resistant spray paint, raised tray or hanging kit
• Cost: Parts $5–$15
• Safety: Work in a well-ventilated area and wear gloves
- Choose an outdoor clear sealant or spray varnish to cover your tin can project. This stops water from seeping in and causing rust.
- Spray a coat of rust-resistant paint to give your piece a bright, lasting look. Make sure the paint is made for outdoor use.
- Let each coat dry completely before applying another layer. This helps the protection set properly.
- Place your finished piece on a raised tray or hang it up to keep water from pooling on it. This avoids long-term damage.
- Clean off any dirt and leaves regularly, and cover or store your project during winter to fight off corrosion.
Embracing Sustainable Upcycling Practices for Garden Decor
Quick Fix:
• Outcome: Create charming garden planters from old tin cans.
• Time: 15–30 min per project.
• Skill: Beginner.
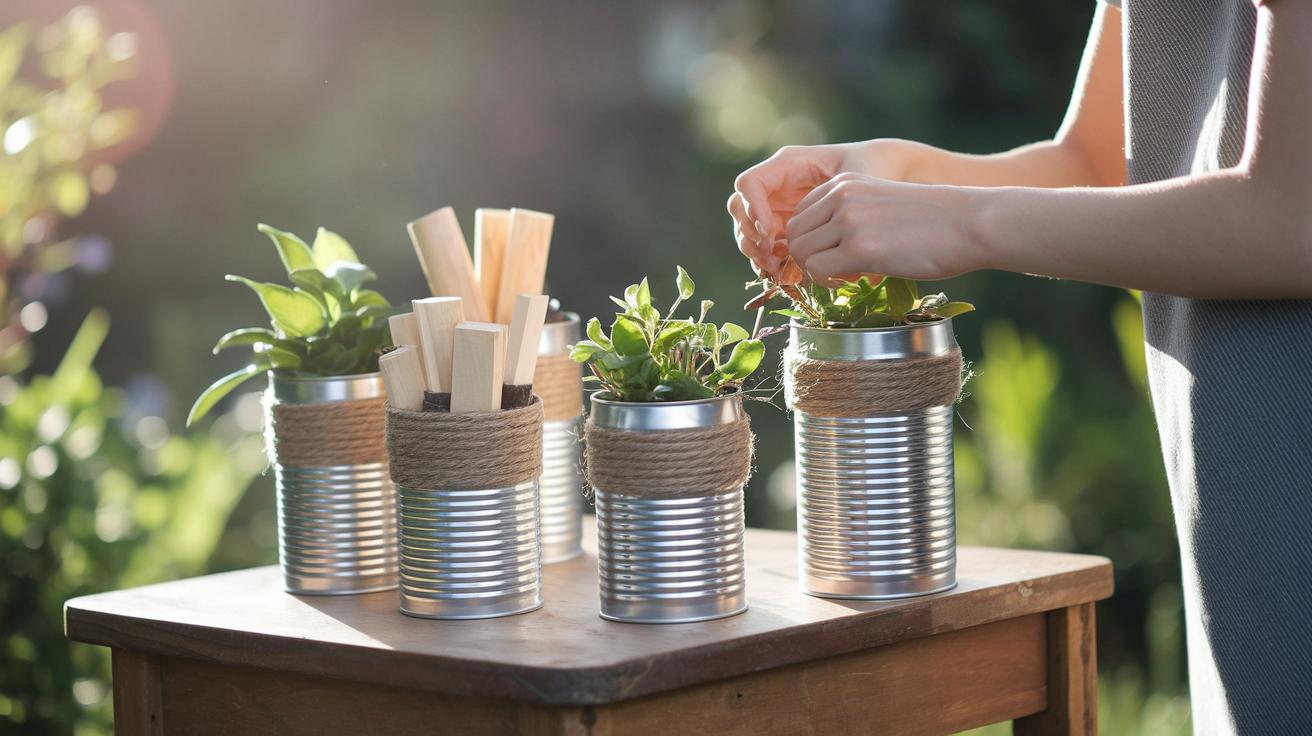
• Tools & Materials: Tin cans, twine, wood scraps, and leftover paint.
• Cost: Minimal, often free or very low cost.
• Safety: Wear gloves to handle sharp edges.
- Look around for unused items you can recycle.
- Clean your tin cans and smooth any rough edges.
- Use scraps like twine, wood pieces, and paint to turn the cans into eye-catching planters.
- Place your new planters in the garden and enjoy a burst of eco-friendly charm.
This method turns everyday items into useful art while keeping costs low and reducing waste. Each recycled can shows that you care about both your garden and the environment.
Share your work with neighbors or on social media. Donate extra planters or host a swap event to spark ideas in your community. Every project you finish helps create a cycle of creative recycling and a greener way of living.
Final Words
In the action, you explored various eco-friendly projects that transform everyday tin cans into charming garden decor. You learned to clean, prepare, and paint cans into herb planters, lanterns, wind chimes, and more. Each step shows how to upcycle tin cans for garden decor with minimal tools and effort. You also picked up tips on safety and weatherproofing to keep your creations lasting. With these practical projects at your fingertips, enjoy creating a lively and sustainable outdoor space that's both unique and budget-friendly.
FAQ
What can you do with tin cans in the garden?
The potential of tin cans in your garden is vast; repurpose them as planters, lanterns, bird feeders, or wind chimes to add eco-friendly charm and practical style to your outdoor space.
How do you turn a tin can into a planter?
The process to turn a tin can into a planter involves thoroughly cleaning it, removing labels, drilling drainage holes, sanding sharp edges, and then decorating with outdoor-safe paint for lasting use.
What kind of paint do you use on tin cans?
The type of paint used on tin cans should be outdoor-rated, rust-resistant spray or enamel paint, which protects the metal and stands up to weather while adding a decorative finish.
How can I get started with simple DIY tin can garden decor?
The advice for easy DIY tin can garden decor includes starting with cleaned and prepped cans and using online inspirations like Pinterest to find crafts such as planters, lanterns, or wind chimes that suit your style.