
Quick Fix: Patch a Leaky Pipe
• Outcome: Stop a small leak
• Time: 10–15 min
• Skill: Beginner
• Tools & Materials: epoxy putty, silicone, or self-fusing tape, clean cloth
• Cost: $3–$15
• Safety: Turn off the water before you start
- Turn off the water at the shutoff valve near the leak.
- Dry the pipe with a clean cloth so the sealant will stick.
- Pick your sealant (epoxy putty, silicone, or self-fusing tape) based on your pipe material and leak size.
- Follow the instructions on the sealant package , apply it evenly over the leak.
- Let it cure as directed before turning the water back on.
You don’t always need a major repair. A quick patch can save you time and money, giving you a reliable fix without calling a pro.
Best Sealants for Leaky Pipes: Top Product Recommendations
Epoxy putty works great on metal, PVC, ABS, and fiberglass. Mix the resin and hardener together and it sets in 5–10 min, with a full cure in 1–2 hours. This fix is strong and forms a lasting patch for leaks around joints and corners.
Silicone sealants give you a flexible and waterproof repair for small drips. They work well on leaks that don’t face high pressure. Just note it takes about 24 hours to set completely.
Teflon thread tape (0.75 in by 520 in) is ideal for sealing threaded connections. Wrap it around the threads 3–5 times to get an airtight seal, even if the threads aren’t the cleanest.
Self-fusing rubber sealing tape acts like a quick bandage for a leak. It sticks best on flat surfaces and is perfect for stopping a drip until you can do a proper repair.
J-B Weld SteelStik is another option for both metal and plastic pipes. Some reviews say it might not hold up long term, so keep that in mind.
Proxicast adhesive tape is versatile and can be used for plumbing, electrical, and automotive jobs. Just ensure the surface is clean and free of debris for the tape to stick well.
How to Choose the Right Sealant for Your Leaky Pipe
Quick Fix:
• What: Stop a leaky pipe
• Time: 15–30 min
• Skill: Basic DIY
• Tools & Materials: The right sealant for your pipe, cleaning cloth, and a small brush
• Cost: $5–$20
• Safety: Always double-check manufacturer warnings before using
-
Check Your Pipe Material
Copper and galvanized steel need a different sealant than PVC or ABS. Pick a sealant that fits the pipe. For example, use a metal paste for copper pipes and a PVC repair compound for plastic pipes. This keeps your material safe. Avoid using petroleum-based paste on PVC or ABS because it can harm the plastic. -
Choose the Right Sealant for the Leak Size and Pressure
A tiny drip (like a pinhole) might only need a light touch epoxy mix. For bigger leaks, you may need a tougher sealant or even a clamp. Always look at the PSI rating on the product. Household pipes can run anywhere from 1,000 to 80,000 PSI. Even small leaks need a sealant with enough strength to hold. -
Mind Your Operating Conditions and Safety
Temperature swings, chemicals, or damp surfaces can change how a sealant works. If you might seal underwater, choose one that cures in wet conditions. For pipes that carry drinking water, use non-toxic sealants. Always follow all safety instructions from the maker and try a small test spot before a full repair.
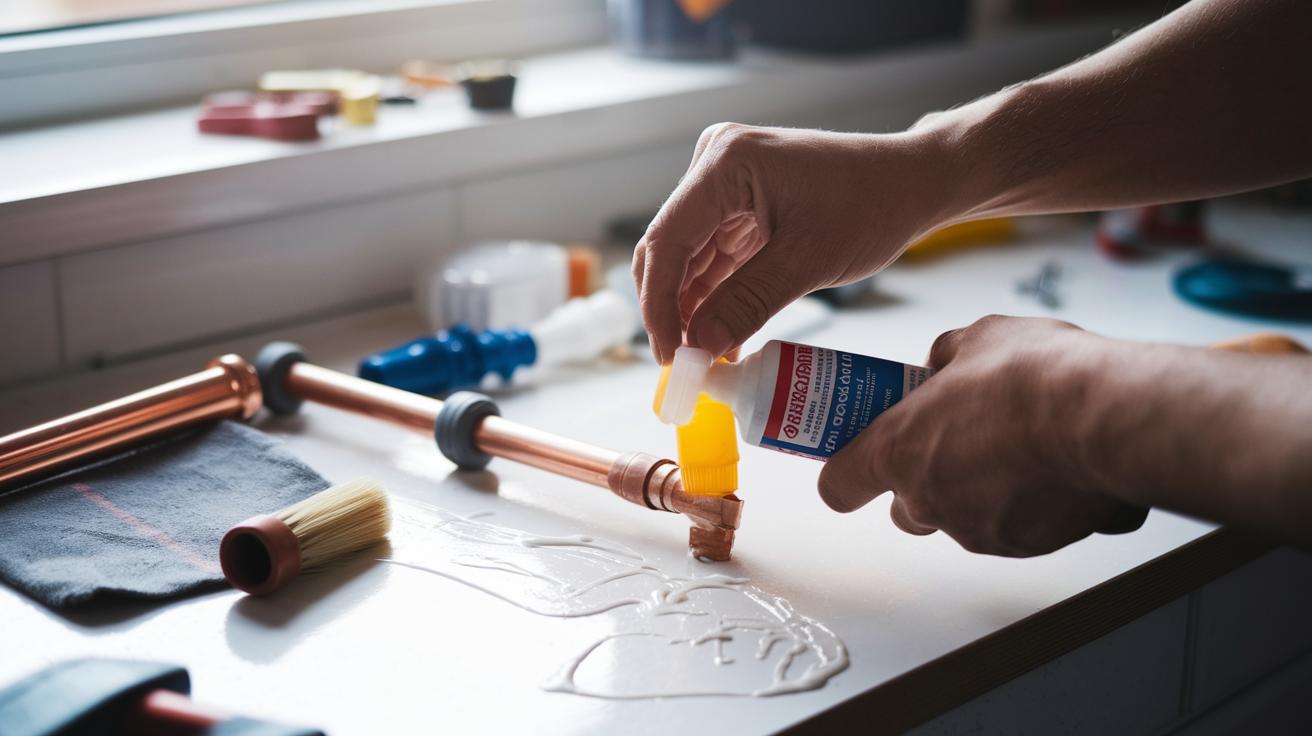
Application Steps for Installing Pipe Leak Sealants
Quick Fix:
• What: Stop leaks and secure your pipe
• Time: 15 min to 24 hr (depending on the sealant)
• Skill: Beginner
• Tools & Materials: Shut off valve, cloth, small brush, light sandpaper (optional), epoxy or silicone sealant
• Cost: Parts $3–$10
• Safety: Shut off the water before starting
-
Turn Off the Water and Prep the Area
Turn off the water supply by closing the valve. Drain the pipe and wipe the area with a cloth. Use a brush or sandpaper to remove rust, scale, and debris so the sealant can stick. -
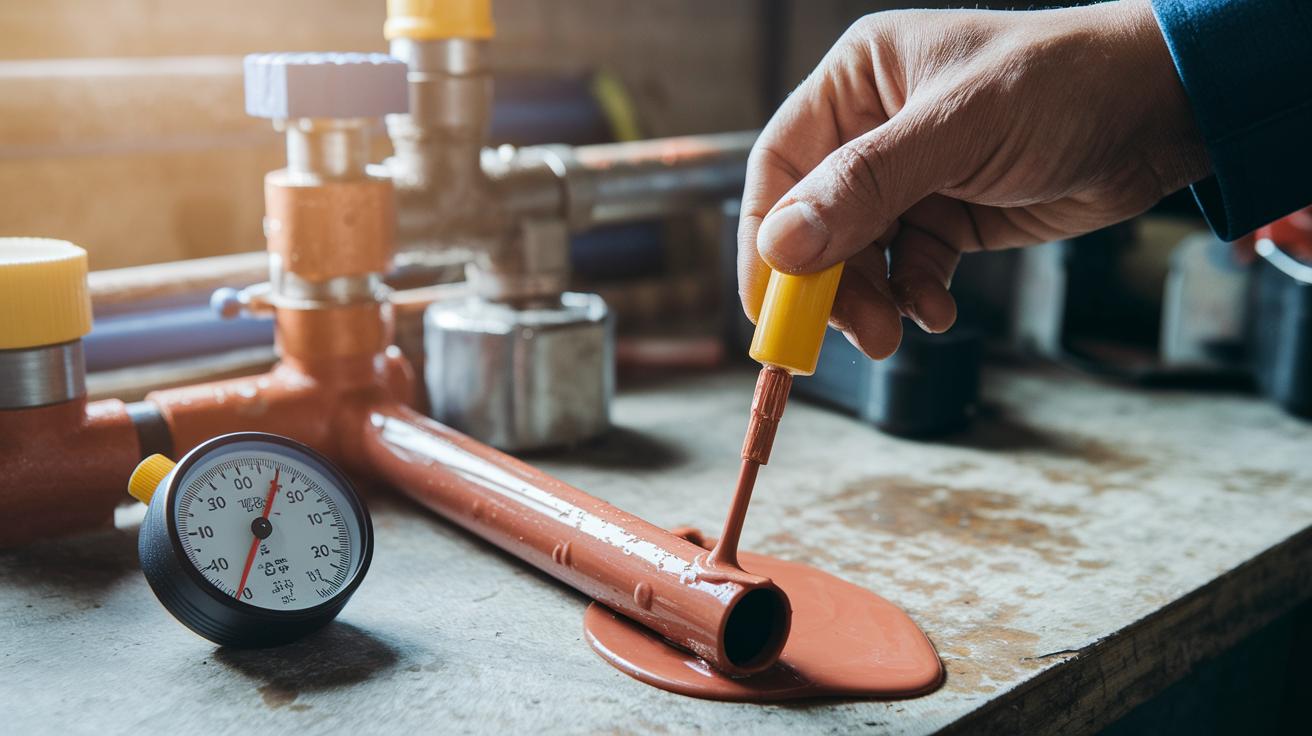
Apply the Sealant
Press the epoxy putty firmly into the crack or, if you’re using silicone, smooth it over the leak. Cover at least 1 inch (2.5 cm) around the damaged spot to fully seal the area. -
Let the Sealant Cure
Allow the sealant to harden before turning the water back on. Epoxy usually sets in 5–10 min, while silicone might need up to 24 hr. This ensures the repair is strong and leak-free.
Sealant Comparison Table: Epoxy Putty vs. Silicone vs. Tape
Below is a quick guide to help you choose a sealant for leaky pipes. If you need a tough fix in a hurry, try epoxy putty. It works on wet surfaces and can handle pressures from 1,000 PSI (pounds per square inch) up to 10,000 PSI. It sets in 5–10 min and fully cures in 1–2 hr. For a slow drip or a non-pressurized joint, silicone sealant is a better choice. It stays flexible for moving joints and is safe for drinking water, but it takes about 24 hr to cure and usually holds around 1,000 PSI. Teflon tape is different. Wrap 3–5 layers around threaded connections for an instant airtight seal, no curing time needed. Repair tape is another option; it’s a self-fusing silicone that acts like a temporary bandage on smooth, flat surfaces. However, it isn’t as effective on corners or threads and should only be used until you can complete a permanent fix.
| Sealant Type | Application | Cure Time | PSI Rating | Advantages | Drawbacks |
|---|---|---|---|---|---|
| Epoxy Putty | Good for metal, PVC, ABS, and wet surfaces | Set: 5–10 min; Full: 1–2 hr | 1,000–10,000 | High strength and durable bond | Can be too hard for flexible joints |
| Silicone Sealant | Ideal for slow drips and non-pressured leaks | Cures in 24 hr | ~1,000 | Flexible and safe for potable water | Longer cure time; not for high pressure |
| Teflon Tape | Used on threaded pipe connections | No curing | N/A | Instant, airtight seal and low cost | Can get dirty; limited to threads |
| Repair Tape | Temporary fix on flat surfaces | No curing | N/A | Self-fusing and stops leaks quickly | Not ideal
Temporary vs. Permanent Solutions for Leaky PipesQuick Fix:
Temporary fixes work well in a pinch, giving you time to gather the right tools and parts for a proper repair. They buy you time but aren’t built to last. Once the leak is under control, follow up with a permanent solution to save money and avoid repeat repairs. Maintenance Tips to Prevent Future Pipe Leaks with Sealants
Quick Fix:
Regular care like these steps can stop leaks before they harm your home. Treat this routine as your go-to leak control strategy to keep your plumbing safe and sound. Final WordsIn the action, you reviewed top options, compared features side-by-side, and learned how different sealants work for various pipe materials. This guide walked you through prep, application, and both temporary and long-term fixes. You now have the know-how to tackle leaks using a sealant for leaky pipe. Keep up regular checks, and your repair work will pay off. Happy fixing! FAQWhat does a waterproof sealant for leaky pipes do and which type is best?A waterproof sealant for leaky pipes creates a liquid-tight bond to stop drips. Epoxy putty and high-pressure formulas work on metal, PVC, and ABS, offering a durable repair. Which sealant works best for high-pressure leaks and can I find it at Home Depot?A quick-curing epoxy putty is ideal for high-pressure leaks. Home improvement stores stock these products, which form a robust bond on various surfaces, handling pressure efficiently. Can silicone sealants fix a leaking pipe effectively?Silicone sealants fix small leaks on non-pressurized pipes by forming a flexible bond. While they seal well, they cure in about 24 hours and may not suit high-pressure areas. How can I fix a leaking pipe joint without removing the pipe?To fix a leaking pipe joint, shut off the water, clean the area, and apply the sealant over the leak. This method creates a reliable seal without needing to remove the pipe. Is there a PVC-specific sealant for leaks and what is an internal pipe leak sealer?A PVC-specific sealant bonds effectively with plastic pipes, while an internal pipe leak sealer treats leaks from inside, making it suitable for potable water systems and ensuring a safe repair. Latest articlesMore like this |
