
Quick Fix: Stop Hidden Wall Leaks
• What: Fix leaks that push up your water bill
• Time: About 15 min
• Skill: Beginner (a careful look is enough)
• Tools/Materials: Flashlight, screwdriver (if needed)
• Cost: Save money by preventing damage
• Safety: Watch for slippery spots and water damage
- Check your bill. Notice if charges rise even with low use.
- Look at your walls. Hidden leaks can waste water and harm your home.
- Follow our 5 simple fixes to keep leaks in check.
- Seal the leak. Prevent water loss with basic repairs.
- Save money and protect your home from water damage.
Read on for easy steps and tips that help you act fast and keep your home safe.
Quick Guide to Identifying and Fixing a Leaky Pipe in Wall
Quick Fix:
• What: Find the leak behind your wall and stop water loss
• Time: 15–20 min
• Skill: Beginner
• Tools & Materials: Moisture meter (reads under 1% for dry), infrared camera (if you have one), epoxy putty or rubber repair clamp, screwdriver or cutting tool for access
• Cost: Parts $3–$10
• Safety: Shut off the main water before you start
Hidden leaks in your wall can hike up your water bill and hurt your home. Look for water stains on your drywall, peeling paint, saggy ceilings, or a musty odor. Even if you don’t see damage, a hidden leak might be making your meter run faster. Use a moisture meter to check the wall (normal reading is under 1%) and watch for unusual water use.
Follow these steps to find and slow the leak:
- Shut off the main water supply and check the water meter to make sure no water is flowing.
- Look closely at your wall for stains, bulges, or bad smells.
- Run a moisture meter along the wall and note any wet spots.
- If you have one, use an infrared camera to see hidden wet areas.
- Cut a small hole over the spot that feels the wettest to check inside.
Once you pinpoint the leak, dry the area completely. When the leaking pipe is exposed, use a temporary patch like epoxy putty or a rubber repair clamp on clean, dry surfaces. This short-term fix slows the water loss until you can replace the damaged section or do a better repair. Keep checking the patched spot, and call a professional if the leak continues or you notice more damage. Stay calm and follow each step to protect your home.
Common Causes of a Leaky Pipe in Wall
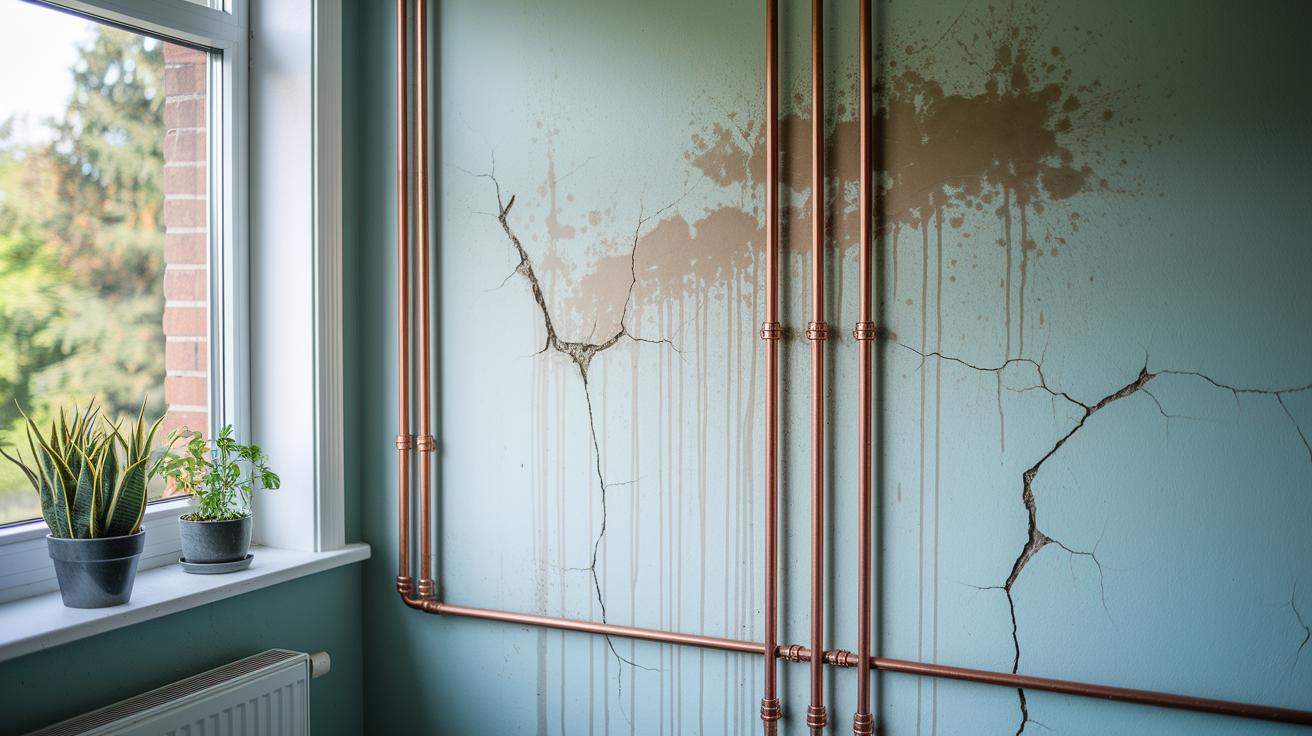
Inside your wall, worn out pipes and loose joints are common culprits. Aging copper or galvanized pipes can develop small cracks from rust. Over time, these cracks let water seep out and leave wet spots and stains on your wall. A regular check can help catch these issues early.
Building movement can also stress the pipes. As your home shifts or settles, the supports may move and force weak spots to leak. Look for bulges or unusual curves in your wall to spot this problem.
Sometimes water from outside can mimic a leaky pipe. Failing caulk, broken flashing, clogged downspouts, or faulty sprinklers can let water pool behind the wall. Checking and maintaining these exterior seals and drains can keep your walls dry and prevent confusion with an internal leak.
Safe DIY Solutions for Repairing a Leaky Pipe in Wall
Quick Fix
• What: Stop a leak in a wall pipe
• Time: 20–40 min
• Skill: Basic DIY
• Tools & Materials: Goggles, gloves, dust mask, epoxy putty or rubber clamp, pipe cutter, push-fit or solder fittings, joint compound
• Cost: $5–$30
• Safety: Turn off the water first; wear safety gear
-
Prepare the Work Area
• Turn off the main water supply at the meter to stop more water from leaking.
• Remove any loose insulation and let the wall cavity dry completely before you start.
• Put on your goggles, gloves, and dust mask. A dry, clear work area helps the repair stick and keeps dust in check. -
Seal Small Leaks
• If you see a small, pinhole leak, clean the pipe by scrubbing off dirt and moisture.
• Apply epoxy putty or secure a rubber repair clamp firmly around the clean, dry pipe.
• Turn the water on briefly to see that the patch holds under pressure. -
Replace Damaged Pipe Sections
• For larger leaks, neatly cut out the damaged pipe section.
• Attach a new pipe segment using either push-fit fittings (a tool-free join) or soldered fittings.
• Run a pressure test by turning the water back on.
• Once secure, repair the wall by applying joint compound on the drywall and let it cure fully.
When to Call a Professional for a Leaky Pipe in Wall
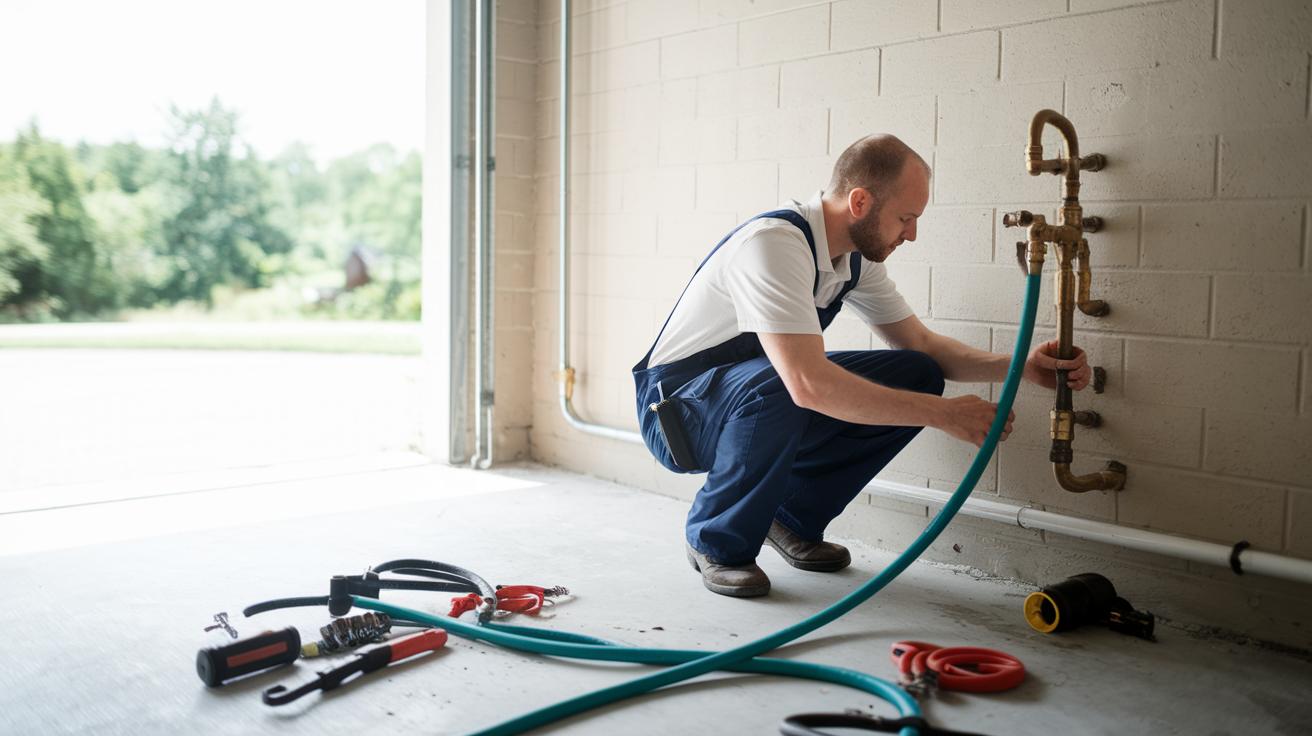
Quick Fix:
• What: Get a licensed plumber to stop a leak inside your wall.
• Time: Varies (the job may take from less than an hour to a full day).
• Skill: Professional plumbing work.
• Tools & Materials: Professional tools only.
• Cost: About $300 for small fixes up to $1,200 or more for big repairs.
• Safety: Turn off water and watch for mold, sagging drywall, or hidden damage.
- If your quick fixes are not stopping the leak, stop trying DIY methods.
- Look for signs like constant water leakage, mold growth, droopy drywall, or tight access to the pipe inside the wall.
- Even if you use moisture sensors or infrared scanners (tools that spot hidden water), these tools may reveal a deeper problem than a small drip.
- When these issues show up, safety risks and long-term damage can rise fast.
- In these cases, call a licensed plumber who can handle emergency restoration and permanently fix the problem.
- When choosing a professional, ask to see their license and check customer reviews to be sure they have the right experience.
- A solid repair not only stops the leak now but also helps prevent future damage and saves you money in the long run.
Preventative Maintenance to Avoid Future Leaky Pipes in Walls
Quick Fix:
- What: Keep your wall pipes dry and leak-free
- Time: 30 min
- Skill: Basic DIY
- Tools & Materials: Vapor barrier, upgraded wall insulation, moisture meter, caulking, sealant
- Cost: $10–$50
- Safety: Wear gloves and work carefully
- Install a vapor barrier. When you remodel, add a vapor barrier behind your drywall and upgrade the insulation. This simple step cuts down on moisture that can cause leaks.
- Check for moisture. Once a year, use a moisture meter to scan your walls. Dry areas should show less than 1% moisture. Higher readings might mean a hidden leak is starting.
- Seal outdoor openings. Reseal flashings, caulking, or downspout connections that let water in. Keeping these parts tight helps stop small drips from becoming big problems.
- Get regular plumbing checks. A simple inspection now and then can catch tiny issues before they turn into expensive repairs.
Follow these steps to help keep your home dry and avoid costly water damage.
Final Words
In the action, we broke down spotting hidden leaks, inspecting signs like stains and odors, and using tools like moisture meters and infrared cameras. The guide walked you through safe DIY repairs and key steps to isolate damage with a temporary patch or clamp.
You learned when hands-on fixes work and when to reach out for expert help. Tackle a leaky pipe in wall smartly to save time, money, and avoid further damage. Stay safe and keep improving your home.
FAQ
What is the estimated cost to repair a leaking pipe in a wall?
The cost depends on the damage severity—minor fixes may cost a few hundred dollars while major repairs and wall replacement can run over $1,200.
What do Reddit discussions say about a leaky pipe in a wall?
Reddit posts show that many fix small leaks with epoxy putty or clamps, but larger issues often require cutting into the wall and replacing damaged pipe sections.
What causes water seeping through a wall during rain and how should it be fixed?
Water seeping during rain often arises from poor exterior seals or blocked drainage. Fixing it involves sealing external gaps and addressing any underlying internal leaks.
How do you fix a leaky pipe inside a wall?
Fixing a leaky pipe inside a wall starts by shutting off the water, accessing the leak, and then applying epoxy or a repair clamp on small leaks or replacing the pipe if needed.
What is wall leak sealant and how is it used?
Wall leak sealant is a patch material used to stop moisture penetration by sealing small leaks temporarily until a permanent repair can be made.
What happens if a pipe in the wall is leaking?
A leaking pipe can damage the drywall, foster mold growth, and drive up water bills. Prompt detection and repair can help prevent extensive and costly damage.
Does homeowners insurance cover a leaking pipe in a wall?
Homeowners insurance may cover sudden and accidental leaks but often excludes damage from long-term corrosion or neglect. Review your policy details for specifics.
How long does it take for a wall to dry out after a leak?
The drying time varies with wall material and ventilation but typically takes from several days to a few weeks once the leak has been properly fixed.