
Quick Fix: Make a Cute Tin Can Pencil Holder
Time: 30–45 min
Skill: Beginner
Tools & Materials: Old tin can, soap and water, sandpaper, fun fabric, scissors, glue (or double-sided tape)
Cost: $1–$5
Safety: Wear gloves if needed, and work on a flat surface
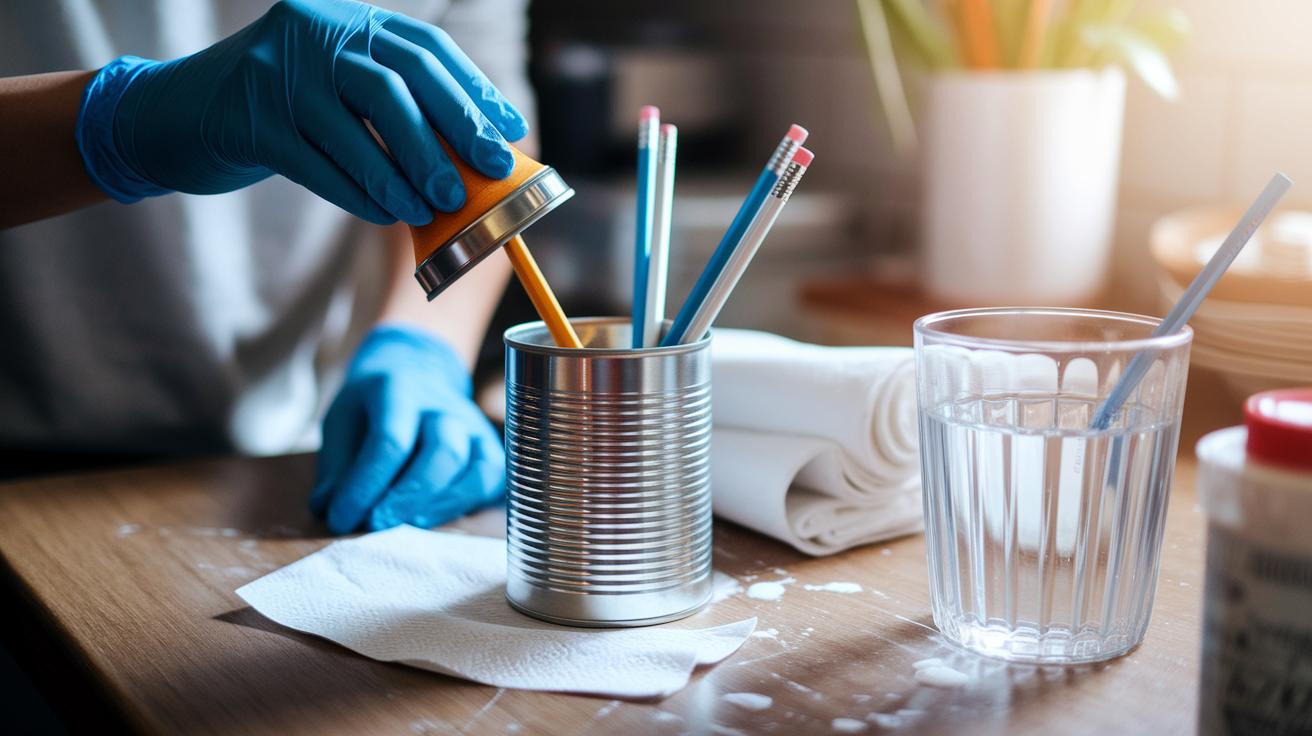
- Clean the can thoroughly with soap and water.
- Smooth the edges using sandpaper so you won’t cut yourself.
- Cut your fabric to wrap around the can.
- Use glue or double-sided tape to secure the fabric neatly around the can.
- Let it dry for a few minutes, then fill it with your pencils or art supplies.
Enjoy your new organizer and add a bright, creative twist to your work space!
tin can pencil holder DIY: Spark Creative Joy
Quick Fix:
• What: Create a cute pencil holder from an empty can
• Time: 30–45 min
• Skill: Beginner (simple steps with basic tools)
• Tools & Materials: Empty, clean tin can; gloves; scrub brush; sandpaper; soft cloth; detergent; fabric (like a fat quarter, herringbone, or arrowhead print); optional craft glue (Mod Podge)
• Cost: $0–$10
• Safety: Wear gloves and sand carefully
- Soak the can in warm soapy water (about 30 min) to loosen the label.
- Remove the paper and glue by peeling it off once it softens.
- Dry the can completely to prevent rust, then use sandpaper to smooth any rough edges.
- Wipe the can with a soft cloth to remove extra moisture.
- Cut your fabric to fit around the can. If you like, use a bit of craft glue to wrap the fabric neatly.
- Let the can dry fully, then fill it with pens and pencils to add a touch of creative charm to your desk.
Preparing Your Tin Can for DIY Pencil Holder
Quick Fix:
• Outcome: Turn an old tin can into a neat pencil holder.
• Time: 30–45 min
• Skill: Beginner
• Tools & Materials: Warm soapy water, gloves, soft cloth or paper towels, fine-grit sandpaper
• Cost: Likely free if you already have the items
• Safety: Wear gloves and protective eyewear when sanding
- Soak the tin can in warm, soapy water for 30 minutes to loosen the labels and glue. (Tip: Gloves help protect your hands.)
- Gently peel off the paper labels and any glue, using your fingers or a soft tool. (Note: Handle the can carefully to avoid scratching it.)
- Dry the can completely with a rag or paper towels to keep rust at bay.
- Lightly sand the edges and rims with fine-grit sandpaper until the metal feels smooth. (Side note: Cover any rough spots and wear protective eyewear if you prefer.)
- Wipe the can inside and out with a clean cloth to remove any leftover moisture.
Decorating Your Tin Can Upcycled Desk Organizer
Quick Fix
• What: Turn an old tin can into a stylish desk organizer
• Time: 30–45 min
• Skill: Beginner
• Tools & Materials: Tin can (dried and smoothed), fat-quarter fabric, Mod Podge (glue), acrylic paints, clear varnish, washi tape, ribbon, printed vinyl, scissors, ruler
• Safety: Let all glue and varnish dry completely
- Measure and cut your fabric so it wraps neatly around the tin can.
- Brush a thin layer of Mod Podge on the can. Lay the fabric over it and press firmly for a smooth finish.
- Wait until the glue dries completely.
- If you prefer a painted look, skip the fabric. Instead, paint the can with bold acrylic colors. Try a teal base with coral accents for a back-to-school vibe or a mustard base with gray details for a modern look.
- Once your paint has dried, spray a clear varnish over it to protect the finish.
- Add extra flair by applying washi tape along the can’s edge. You can also attach a ribbon for softer lines or wrap printed vinyl for a modern twist.
- For a hybrid style, cover most of the can with fabric and leave a small area bare. Then, add hand-painted details to show off your creative side.
Tips:
• Experiment with different combinations until you find the style that suits your desk.
• The fabric gives a cozy feel, while bold paint makes a strong, modern statement.
• Trims like washi tape, ribbon, or vinyl can fine-tune your design and match your workspace decor.
Enjoy making your upcycled pen cup, a fun and eco friendly craft that brightens up your desk while keeping your workspace organized.
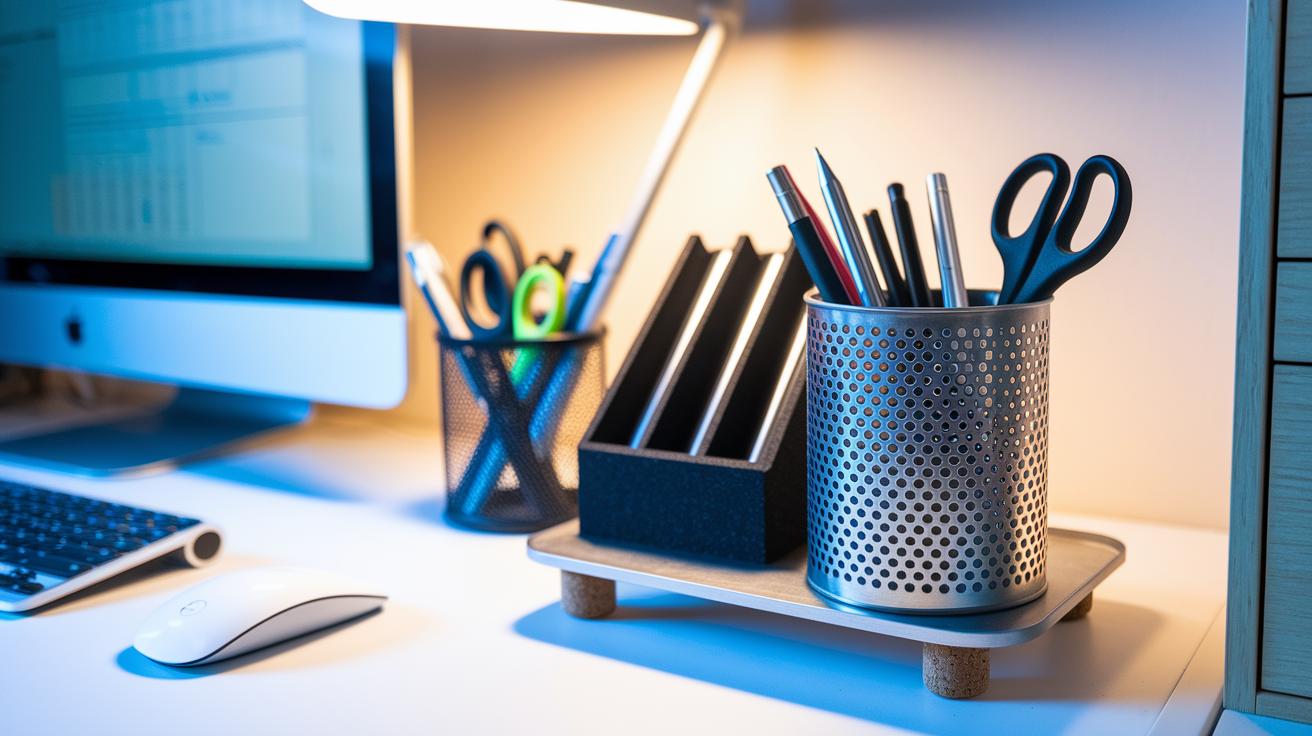
Adding Functionality to Your Tin Can Pencil Holder
-
Make slots with lightweight dividers. Cut small pieces of cardboard or foam board into strips. For example, cut a foam board into 3 equal pieces (sized for your can) and place them evenly inside. This creates neat sections for pencils, pens, and scissors.
-
Attach a magnetic base. Glue small magnets to the bottom of your can so it sticks to metal surfaces like a filing cabinet or fridge door. This saves desk space and keeps your pencil holder in place.
-
Steady the holder with cork feet or rubber bumpers. Stick a cork circle or attach a few pieces of rubber at key spots under the can. This stops it from sliding or scratching your desk.
-
Label each section. Use chalkboard labels or sticker tags on the outside. Write what goes in each slot to help you grab the right tool quickly.
Troubleshooting and Safety Tips for Tin Can Pencil Holder DIY
Quick Fix:
• What: Make your tin can safe and neat for use.
• Time: 15-30 min
• Skill: Beginner DIY
• Tools & Materials: Gloves, safety glasses, fine-grit sandpaper (or file), ribbon or duct tape, rubbing alcohol or acetone, white vinegar, steel wool, scrap fabric, leftover paper.
• Cost: Parts $3–$10
• Safety: Always wear gloves and eye protection.
- Wear gloves and safety glasses before you begin.
- Check the can for any sharp edges after sanding. If you see any, smooth them with fine-grit sandpaper or a file. Then cover the edge with a ribbon or a piece of duct tape to stop any cuts.
- If you notice any glue spills, use a cloth dampened with rubbing alcohol or acetone to remove the dried adhesive. This clears up sticky spots before you decorate.
- For rust spots, soak the area in white vinegar for 10 min. After soaking, scrub gently with steel wool and dry the area well. This stops rust from spreading and keeps the can looking clean.
- Use any scrap fabric or leftover paper to wrap the can as a liner or decoration. This zero-waste tip brightens your project and cuts down on waste.
| Issue | Solution |
|---|---|
| Sharp edges | Smooth with sandpaper or file then cover with ribbon or duct tape |
| Glue mess | Clean with rubbing alcohol or an acetone-damp cloth |
| Rust spots | Soak in vinegar for 10 min, scrub with steel wool, and dry thoroughly |
| Excess waste | Reuse scrap fabric or paper for liners and decors |
Final Words
In the action, you transformed an ordinary can into a neat and useful desk accessory. You cleaned and prepared the tin with care, then added a splash of style using fabrics or paints. Quick fixes for sharp edges and protective tricks help keep your workspace safe. This tin can pencil holder DIY proves that a few simple steps and smart tweaks can bring budget-friendly charm to any desk. Keep experimenting and enjoy your creative, organized space.
FAQ
How can I add extra details to a tin can pencil holder using materials like wood, cardboard, or paper?
The tin can pencil holder DIY lets you combine a cleaned tin can with elements like wood trim, cardboard dividers, or decorative paper to create a unique, personalized desk organizer.
How do I create a DIY pencil holder from recycled materials?
The DIY pencil holder from recycled materials involves cleaning an empty tin can or container, then decorating it with fabric, paper, or simple paints to transform it into a practical home organizer.
How does making a pencil holder with a can work?
Making a pencil holder with a can means you clean and dry an empty tin can, remove labels, and finish it with paints or fabric, turning it into an eco-friendly tool for holding pens and pencils.
How can I make homemade pencil holders?
Making homemade pencil holders involves collecting recycled containers like tin cans, preparing and decorating them safely, and then using them to neatly store writing tools at your workspace.
What items can be used as pencil holders?
Items that can be used as pencil holders include empty tin cans, jars, and even repurposed cardboard tubes, offering flexible and budget-friendly solutions for desk organization.
What can I use instead of a pencil pouch?
Instead of a pencil pouch, you can repurpose a sturdy tin can or similar container, crafting it into a pencil holder that keeps your pens and pencils in one accessible spot.