
Quick Fix: Fix a Stuck or Worn Zipper Slider
• Outcome: Your zipper glides smoothly again
• Time: 15 min
• Skill: Beginner
• Tools & Materials: Needle-nose pliers, flat-head screwdriver, replacement slider (if needed)
• Cost: Around $1–$5 for a new slider
• Safety: Work in a safe, well-lit area and handle your tools carefully
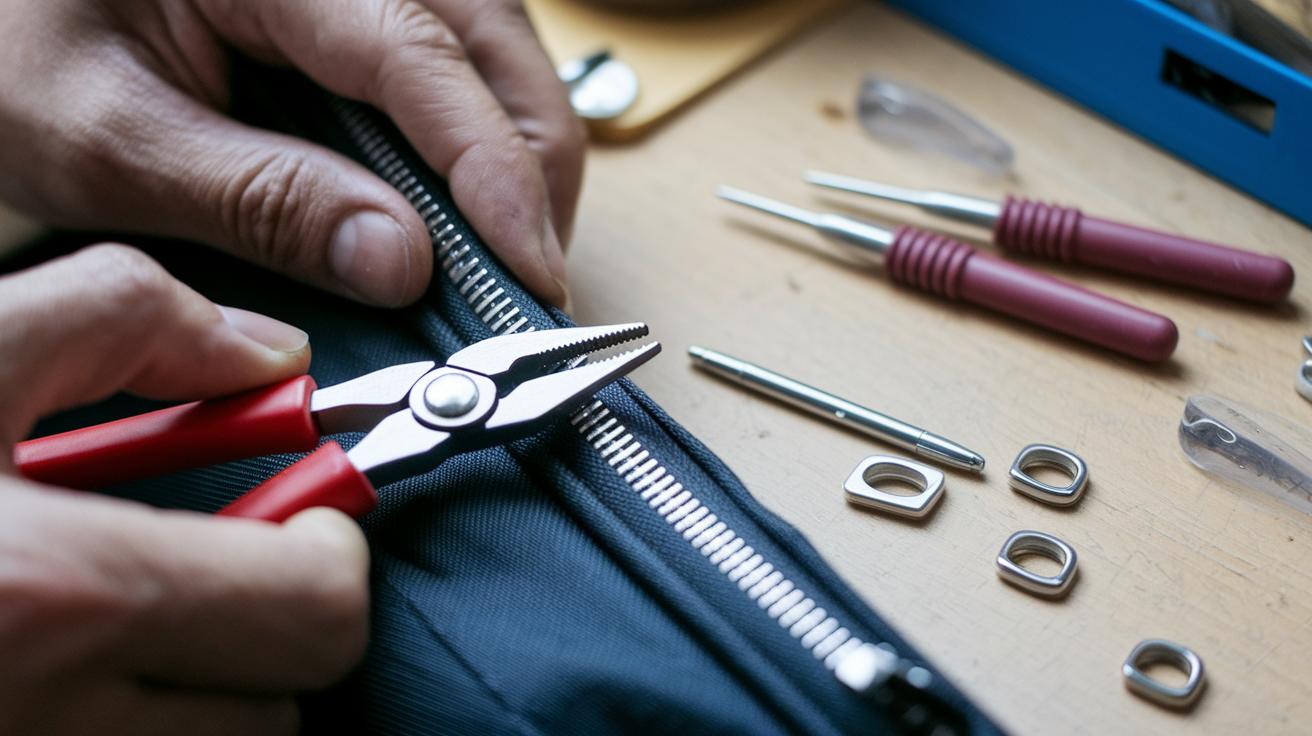
- Check your zipper. Look along the track to see if any debris or damage is causing the slider to stick.
- Use your needle-nose pliers to gently remove any lint or small objects that might be blocking the slider.
- If the slider looks worn out, use a flat-head screwdriver to carefully pry it off.
- Snap on a new slider that fits your zipper style. Make sure it faces the right direction so the zipper will work as intended.
- Test the zipper by sliding it slowly back and forth. If it still sticks, repeat the cleaning or try repositioning the new slider.
Done. Enjoy your smoothly gliding zipper!
Step-by-Step Zipper Slider Repair Guide
Quick Fix:
- What: Fix a stuck or worn zipper slider
- Time: 15 min
- Skill: Beginner (take care when using pliers)
- Tools & Materials: Needle-nose pliers, flat-head screwdriver, new zipper slider, new stops if needed
- Safety: Work slowly and be gentle to avoid damaging the zipper
-
Check Your Zipper Type
Look at your zipper closely. Note if it is made for a Nylon Coil, Vislon, or Metal zipper. Check for marks like "YKK 5CN" to be sure you have the right size. -
Remove the Stops
If you have a separable zipper, slide it to the bottom. Use your needle-nose pliers to carefully remove the top stop. For closed-loop zippers, use your pliers to lift off the bottom stop. This step gives you room to put on the new slider. -
Remove the Old Slider
Carefully pull off the old slider. If it sticks, use a flat-head screwdriver to gently ease it off the teeth. Do not force it so you do not cause more damage. -
Insert the New Slider
Place the new slider on the box side of the zipper. Align it so that the moving parts meet the teeth correctly. Slide it up and down a few times to make sure it moves smoothly. -
Reinstall the Stops
After the new slider is on, put the stops back. For separable zippers, attach a new top stop. For closed-loop designs, carefully reattach or replace the bottom stop with your pliers. -
Test the Zipper
Work the slider up and down a few times. Make sure it moves easily and the zipper closes properly. Adjust if needed, and soon your zipper will work like new.
Essential Tools & Materials for Zipper Slider Repair
Quick Fix: Replace a sticky or broken zipper slider in about 15 min with tools you likely have at home. You’ll need needle-nose pliers (or nippers), a flat-head screwdriver, a matching replacement slider kit, a bit of zipper lubricant, and a sewing repair kit if you have a closed-loop zipper.
- Use needle-nose pliers to remove the stops that hold your slider in place. These small tools let you quickly pull the stops off so you can slide the old piece out.
- If your slider is jammed in a tight spot, grab a flat-head screwdriver. It helps you gently pry open metal tabs without damaging the zipper.
- Match the new slider kit with your zipper’s size and type. Whether your zipper is nylon coil, Vislon, or metal, using the right part will get the zipper gliding smoothly again.
- If the zipper still feels sticky, add a drop of zipper lubricant. This helps the slider move easily along the track.
- For closed-loop zippers, like those on a bag or backpack, a small sewing repair kit comes in handy. Use the extra threads and zipper stop caps from the kit to secure the new slider in place.
Identifying Zipper Types & Slider Sizes
If your zipper slider has lost its track, start by checking that the slider matches your zipper’s type and size. Look closely at the back or tip of the slider for any markings like "YKK 5CN." This label tells you the slider’s size and confirms the zipper style.
There are three main zipper types:
- Nylon Coil zippers use a flexible strand (monofilament) that slides easily. They come in both forward and reverse styles.
- Vislon zippers have molded plastic teeth made from acetal or polyacetal.
- Metal zippers feature metal teeth, usually brass or aluminum.
Each type needs the right slider size, typically between #3 and #10. Using the wrong slider can make the misalignment worse.
For example, if you try to fix a brass-toothed zipper with a plastic slider, the new slider may not hold correctly. Always check carefully before you start the repair.
| Zipper Type | Teeth/Coil Material | Common Sizes |
|---|---|---|
| Nylon Coil (Forward/Reverse) | Monofilament | #3, #5 |
| Vislon (Molded Plastic) | Acetal/Polyacetal | #5, #8, #10 |
| Metal Zippers | Brass, Aluminum | #4, #5, #7 |
Troubleshooting Common Zipper Slider Issues

Quick Fix:
• What: Get your zipper slider running smoothly again.
• Time: 10 min
• Skill: Beginner
• Tools & materials: Lubricant (like silicone spray), needle-nose pliers, cotton swab
• Cost estimate: Parts $1–$3
• Safety: Work slowly and keep your fingers clear
- Check for jams. Look for fabric caught in the zipper or misaligned teeth. If you see any loose strands, gently pull them out.
- Lubricate the slider. Run a drop of lubricant along the zipper track to reduce friction. This often clears small jams.
- Fix misaligned teeth. Use your eyes to spot any bent or off-set teeth. Then, with needle-nose pliers, carefully realign them. A little pressure usually does the trick.
- Apply extra lubricant. If the slider still sticks after realigning, dab a bit of lubricant on a cotton swab and use it to coat the teeth.
- Inspect the stops. Check both ends of the zipper for a broken starter pin or missing top stop. If any parts are loose or broken, remove the remnants with pliers before installing a new slider.
| Issue | Fix |
|---|---|
| Fabric jam | Remove caught fabric and lubricate |
| Bent teeth | Realign with pliers carefully |
| Broken stops | Remove debris and replace the stop |
When to Repair vs Replace Your Zipper Slider
Quick Fix:
• What: Fix your zipper by either swapping the slider or replacing the entire zipper.
• Time: 10 to 30 min.
• Skill: Beginner for a slider swap; Intermediate if you need to sew a new zipper.
• Tools & Materials: New zipper slider (repair kit under $5) or sewing kit for full replacement.
• Safety: Work on a clean, flat surface.
- Check the zipper carefully. Look at the teeth and the fabric tape.
- If the teeth are in good shape and the tape is not ripped, remove the broken slider and snap in a new one. This quick fix usually takes about 10 minutes.
- If you see missing teeth or a torn tape, you will need to replace the entire zipper. You might also have to replace the top or bottom stops if they are damaged.
- Follow the repair kit directions or sew in a new zipper if needed.
Tip: Swapping the slider is a fast and inexpensive fix, but be ready for a bit more work if the damage is extensive.
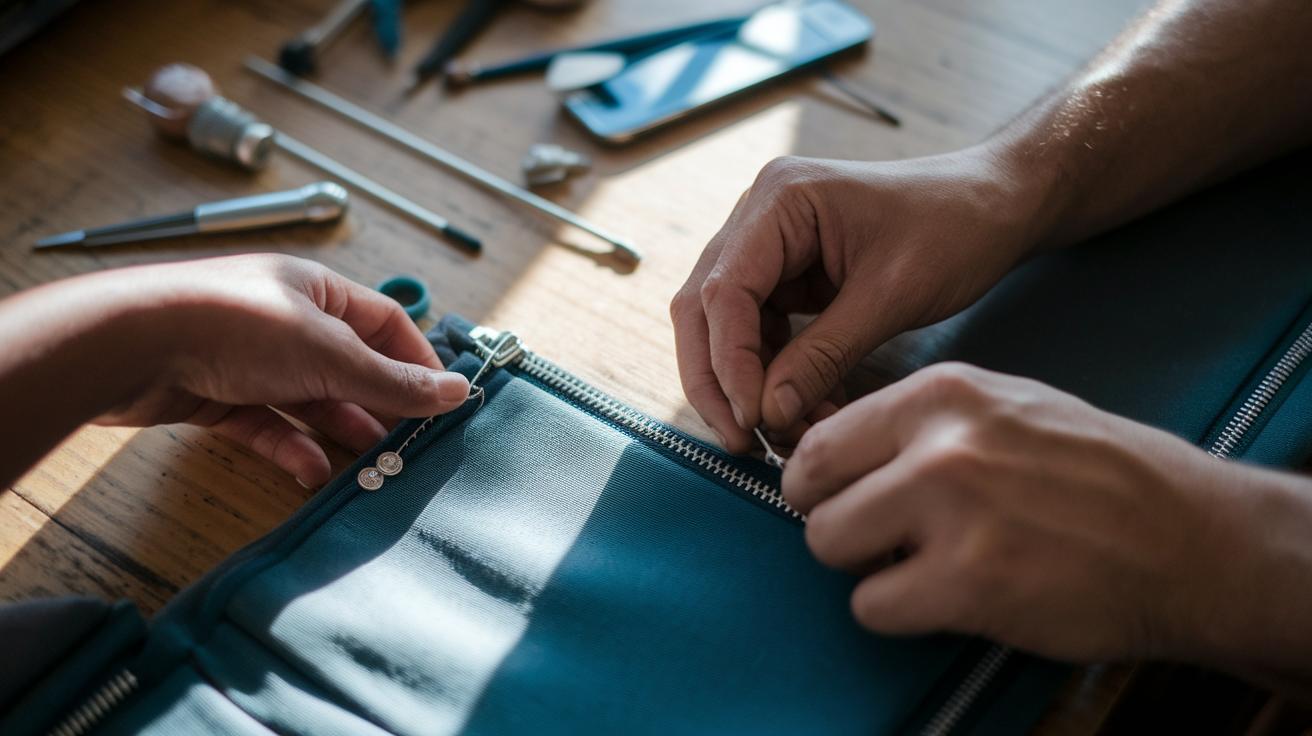
How to Install a Replacement Zipper Slider
If your new slider still isn't running smoothly after installation, try these steps:
-
Check the slider path. Look along the track for any debris, loose fabric threads, or teeth that may be out of line.
- If the slider stops halfway, use fine tweezers to pull out the stray threads. -
Straighten the zipper teeth. Use needle-nose pliers to gently push any crooked teeth back into place.
- This helps the slider engage all the teeth evenly. -
Lubricate the slider. Put one drop of sewing machine oil or silicone spray (a lubricant that reduces friction) along the teeth.
- A little oil can smooth out the movement, much like how a squeaky hinge works quietly after a drop of oil. -
Check the stops. For closed-end zippers, make sure the bottom stop is secure. For open-end zippers, ensure the top stop is in place. Use the right pliers to re-crimp the stops without damaging the fabric.
| Issue | Tip |
|---|---|
| Slider gets stuck | Remove debris and adjust any misaligned teeth |
| Uneven movement | Apply a small amount of oil to the slider and teeth |
| Loose stops | Re-crimp them carefully with the proper pliers |
Test the slider after these adjustments. If it glides smoothly and the teeth fit together well, your troubleshooting has fixed the problem.
Preventive Maintenance & Care for Zipper Sliders
Quick Fix:
• What: Keep your zipper slider smooth and easy to use
• Time: 10 min for inspection, 5 min for lubrication
• Skill: Beginner
• Tools & Materials: Silicone spray or a drop of sewing machine oil, needle-nose pliers
• Cost: Parts $3–$10
• Safety: Work on a clear, stable surface and handle small parts carefully
- Lubricate your zipper. Every 3–6 months, spray silicone or use a drop of sewing machine oil along the slider track. This helps cut friction and stops the slider from sticking.
- Check your zipper closely. Look at the teeth and stops to spot any bending or looseness.
- Fix small issues fast. Use needle-nose pliers to give a gentle squeeze on any loose stops. This helps keep the teeth aligned.
- Use a size and color chart for slider replacements. Matching the exact size keeps unwanted friction down and the slider moving smoothly.
- Stay alert for changes. If your slider starts acting up, check the stops and teeth and make small adjustments to avoid bigger problems later.
Keep up with this routine to enjoy a zipper slider that works every time.
Final Words
In the action, we broke down the repair process step by step. We learned how to diagnose issues, remove stops with pliers, and install a new slider correctly. We also covered how to care for your zipper to prevent future problems. The guide gave you clear steps and tools needed for a smooth fix. With these hands-on tips, you can feel confident when working on how to fix a zipper slider. Enjoy the process and the satisfaction of solving the problem yourself.
FAQ
How to fix a zipper slider on a jacket, bag, or dress?
The zipper slider fix on garments and accessories involves checking the slider type, removing the stops with pliers, then sliding a matching replacement over the teeth and reattaching stops securely.
How to replace a metal zipper slider?
The metal zipper slider replacement means using a new metal slider that matches the original. Remove the top stop with pliers, install the new slider onto the teeth, and crimp the stop firmly for lasting repair.
How to replace a zipper slider with a fork?
The fork method for slider replacement uses a fork as a lever to remove stubborn stops. Gently use the fork to ease the stop aside, then install a new slider so it fits correctly on the track.
How to fix a zipper pull without cutting?
The zipper pull repair without cutting repairs the connection by realigning the pull to the slider. Guide the pull back onto its proper position and secure the slider to catch the teeth properly.
How to reattach a zipper slider that has come off its track?
The zipper reattachment process for sliders that have come off involves carefully aligning the slider with the zipper teeth, applying gentle pressure to guide it back on track, and ensuring proper engagement.