
Quick Fix
• What: Organize your cooler for quick access
• Time: 5–10 min
• Skill: Beginner
• Tools & materials: Cooler, clear zip bags or small baskets, marker (optional)
• Cost: Free to a few dollars
• Safety: Clean hands and equipment before handling food
- Empty your cooler and give it a quick wipe.
- Sort your items into groups: drinks, meals, and ice.
- Place each group in a zip bag or small basket. This step keeps your cooler neat and makes it easy to grab what you need.
- Arrange the bags neatly so you see each group at a glance.
- Enjoy more camp time and fewer moments lost in a messy cooler.
Kickstart Your Cooler Organization Hack for Campers
Quick Fix:
• What: Organize your cooler to keep food and drinks cold and safe.
• Time: 15 min
• Skill: Beginner
• Tools & Materials: Cooler, ice block, reusable square containers, sturdy square plastic bottles (1 gal/3.8 L or 2 L soda bottles), loose ice, heavy-duty bags or plastic bins.
• Cost: Parts $3–$10
• Safety: Close the cooler quickly to keep warm air out
A neat, well-arranged cooler means your food stays cold longer and you grab what you need fast. When every item has its own spot, you save time and reduce any risk of mixing different foods.
- Chill your cooler, meats, and drinks the day before so they start off cold.
- Put a solid ice block at the bottom to form a cold, stable base.
- Freeze water in square plastic bottles to create a snug fit that cuts down on messy melt water.
- Place drinks at the bottom so they stay undamaged under heavier items.
- Layer pre-chilled meals in square, reusable containers on top of the drinks to keep things separated.
- Fill any gaps with loose ice to block warm air from sneaking in.
- Use a heavy-duty bag or plastic container to shield perishable foods from the ice and water, keeping meals safer and fresher.
Following these steps makes your cooler work like a portable fridge. Quick access to every item means you spend less time fumbling in the cold and more time enjoying your trip.
Choosing the Ideal Camping Cooler for Organized Packing

Quick Fix:
- What: Keep your camp food cold and organized.
- Time: 5–10 min to set up.
- Skill: Beginner.
- Tools & Materials: Cooler, ice, food, drinks.
- Cost Estimate: $20–$100 based on the cooler.
- Safety: Watch your step with wet surfaces.
- Pick a cooler that matches your trip. Hard coolers are best for multi-day adventures because they hold ice longer, even though they are heavier.
- For day trips with fewer items, choose a soft or bucket cooler. They are light and easy to carry.
- Pre-chill your cooler the night before. This simple step gives it a head-start for peak cooling when you need it.
A cooler is more than a storage box. It helps you organize meals, drinks, and snacks so everything is easy to find and enjoy.
| Cooler Type | Best Use Case | Key Features |
|---|---|---|
| Hard Cooler | Multi-day camping trips | Strong insulation, long ice retention, secure latches, drain spigot, UV-resistant exterior |
| Soft Cooler | Day trips with lighter loads | Lightweight, portable, easy to pack |
| Wheeled Cooler | Heavy gear and lots of ice | Built-in wheels, robust design, secure latches |
| Bucket Cooler | Casual outings | Simple design, portable, easy access |
Innovative Ice Packing Techniques for Cooler Organization
Quick Fix:
- What: Keep your cooler cold for longer
- Time: Varies by method
- Skill: Beginner
- Tools & Materials: Water, salt, ice bottles, dry ice, gloves (for handling dry ice), regular ice
- Safety: Use gloves for dry ice; keep dry ice away from food
-
Saltwater Ice Bottles
Mix a pinch of salt into water to form saltwater. Use about 1/8 teaspoon of salt per cup (240 mL) of water. Fill your bottles with this mix and freeze them overnight. The salt lowers the freezing point so the bottles take longer to melt. -
Dry Ice Placement
Put on gloves before handling dry ice. Carefully place a piece under your frozen water jugs. This adds extra cold that can stretch your cooling time by 12–24 hours. Always keep dry ice separate from your food by leaving a gap. -
Loose vs. Block Ice
Loose ice fills gaps around your items, blocking warm air from sneaking in. A solid block of ice creates a stable cold base and lasts longer. Use loose ice if you need to shape the layout of your cooler; choose block ice for longer trips where steady cold is key.
DIY Divider Strategies to Optimize Cooler Organization
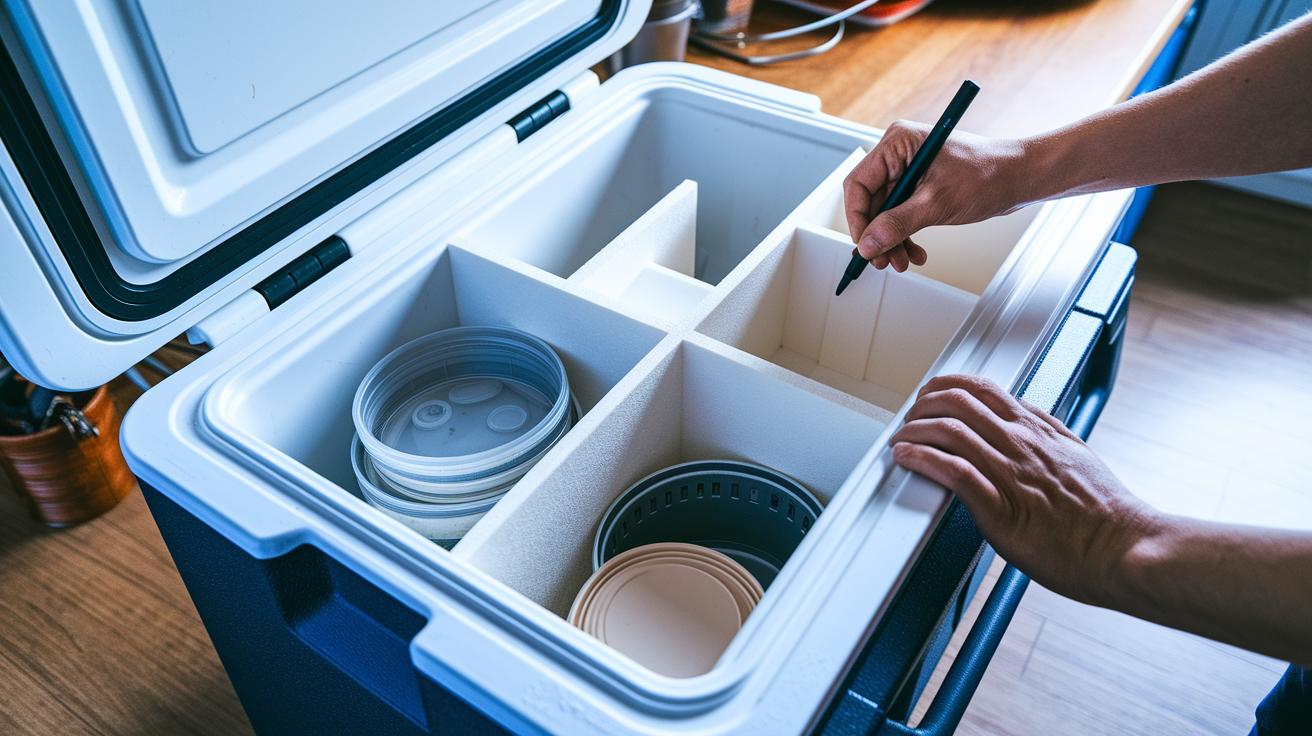
Foam Insert Dividers
Quick Fix: Neatly separate items in your cooler in about 10 min with simple tools.
- Measure a piece of closed-cell foam to match your cooler’s width.
- Use a marker to draw panels where food and drinks will go.
- Cut out the foam panels with a sharp knife or electric cutter.
- Place the inserts in your cooler. Check that meals stay upright and do not shift while moving.
Container-Based Compartments
Quick Fix: Organize meals with easy-to-move compartments in around 10 min.
- Find sturdy plastic bins or dry bags that can be removed.
- Choose sizes that let meals stand vertically in stackable spots.
- If needed, line each compartment with a lightweight material.
- Use these compartments to sort gear, protect delicate items from getting squashed, and keep food easily reachable.
Lid-Area Barriers
Quick Fix: Prevent heat and water mix by adding a barrier in about 5 min.
- Fold a wet towel or cut extra foam strips to fit beneath your cooler’s lid.
- Slip the barrier along the top edge so that liquids stay separate from food.
- This setup helps lower temperature spikes when you open the cooler, keeping cold items undisturbed and your camp meals ready to serve.
Meal Prep Workflow for Streamlined Cooler Organization
| What | Time | Skill | Tools & Materials | Cost | Safety |
|---|---|---|---|---|---|
| Keep meals and drinks cold and easy to grab | 15 min | Beginner | Cooler, reusable square/rectangular containers, labels, zip-top bags | Low | Ensure food stays at safe temperatures |
- Sort your meals and snacks into containers that match your cooler’s layout. Use square or rectangular containers to cut down on wasted space and help keep air out.
- Label each container with its use. For example, mark a zip-top bag as "Day 1 Lunch" for quick access.
- Dedicate one cooler section just for drinks. This keeps bottles and cans separate so they don’t squash more delicate items.
- Freeze extra food items you plan to use later. They double as extra ice, keeping the rest of your meals cool.
- Enjoy a cooler that’s easy to organize. With everything in its place, you can focus on your outdoor fun without digging through a messy cooler.
Cleaning and Storage for Long-Lasting Cooler Organization
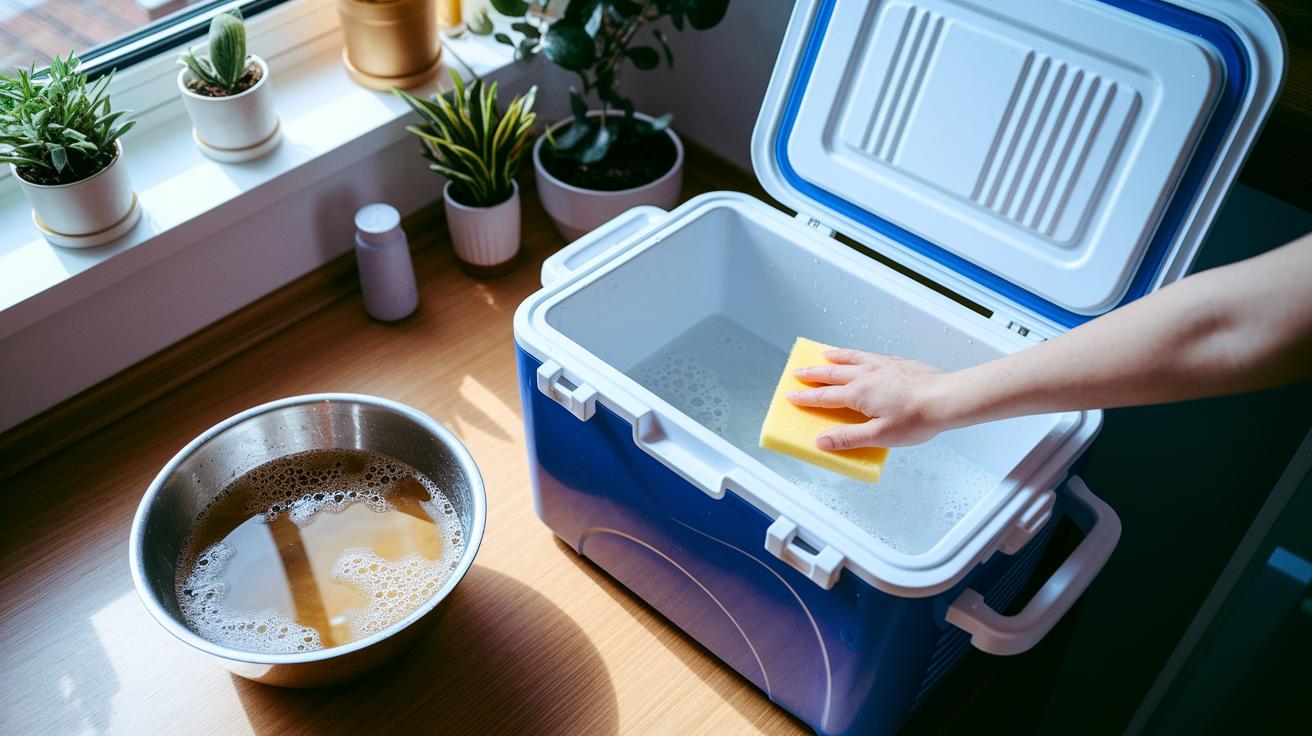
Quick Fix:
• Outcome: A fresh, odor-free cooler
• Time: 20-30 min plus air-drying
• Skill: Beginner
• Tools & Materials: Warm water, dish soap, sponge, UV protectant (optional)
• Cost: $5–$15
• Safety: Let the cooler dry completely to stop mold
- Empty the cooler completely.
- Clean the inside with warm, soapy water. Leave out the bleach.
- Rinse the interior well to wash away any food bits.
- Open the lid and let the cooler air-dry until it is completely dry. This stops mold and bad smells.
- Store the cooler in a dry, shaded spot to protect the seals and insulation.
- Before you head out for your next trip, spray the plastic surfaces with a UV protectant to guard against sun damage.
This routine keeps your cooler fresh and ready for your next adventure.
Final Words
In the action, you’ve learned a camping cooler organization hack that saves time and money. You saw how to build a solid ice base, arrange meals and drinks, and apply DIY dividers to keep everything neat.
Every step, from choosing the right cooler to cleaning it afterward, makes your camping routine smoother and safer. Enjoy putting these tips into practice and making your next trip stress-free. Happy camping!
FAQ
DIY camping cooler organization hack and best camping cooler organization hack?
The DIY cooler organization hack combines layered ice, strategic drink placement, and food separation to boost cold retention and access. It uses solid ice blocks, frozen water bottles, and makes clean zones in your cooler.
How to pack a cooler with drinks, cans, and ice packs?
Packing your cooler with drinks, cans, and ice packs means pre-chilling beverages, placing cans at the bottom, and layering with ice packs to preserve chill while keeping items secure and easily accessible.
How to keep a cooler cold for three days?
Keeping a cooler cold for three days involves pre-chilling items, using large solid ice blocks or frozen water bottles, and strategically layering ice packs to minimize temperature fluctuations and slow melting.
What are some cooler hacks and organizer ideas for camping?
Cooler hacks and organizer ideas include using DIY foam dividers or repurposed bins, layering items by use, and employing clever ice packing techniques. This setup saves time, enhances food safety, and boosts overall efficiency.