
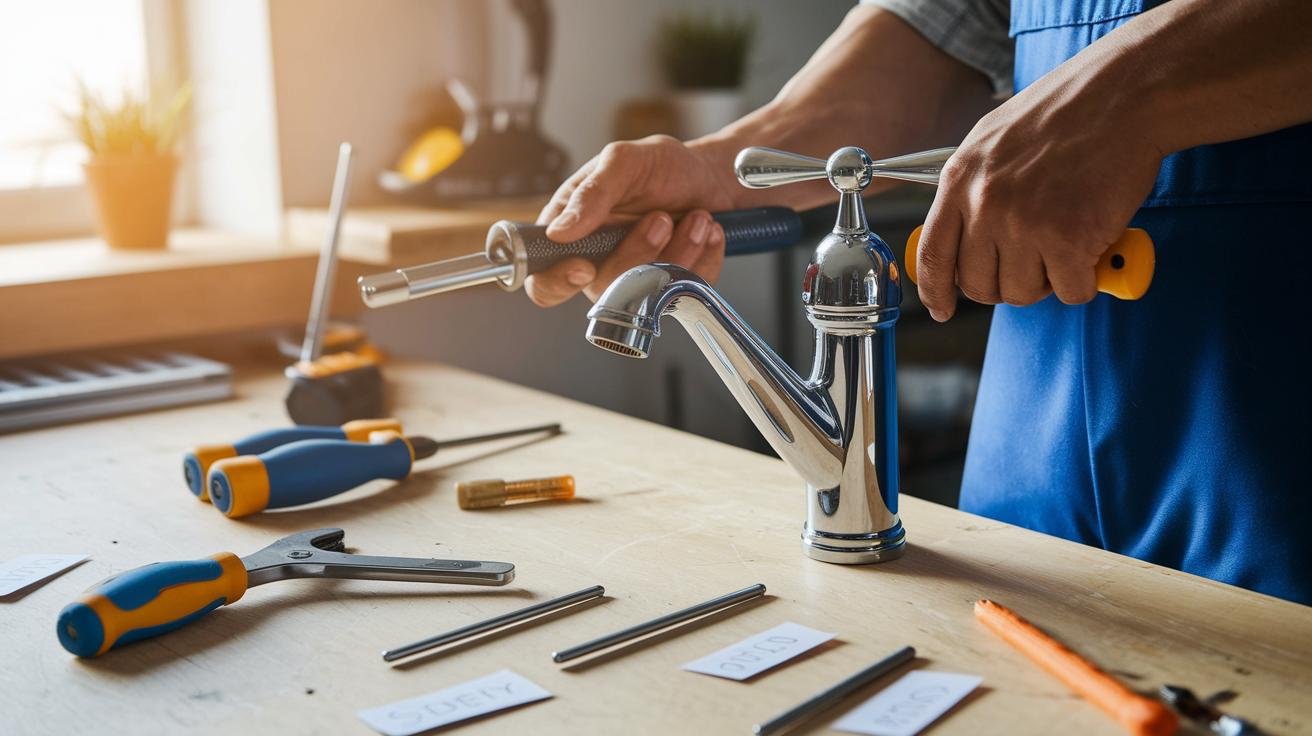
Quick Fix: Stop a Dripping Faucet
• Outcome: Stop the leak
• Time: 15 min
• Skill: Beginner
• Tools & Materials: small screwdriver, adjustable wrench, new washer or cartridge, cloth
• Cost: Parts $3–$10
• Safety: Turn off water before starting
- Turn off the water supply below the sink.
- Open the faucet to let the water drain.
- Remove the handle by unscrewing the fastener (usually hidden under a cap).
- Take out the old washer or cartridge.
- Insert a new washer or cartridge, then reassemble the faucet.
- Turn the water back on and check for leaks.
A leaky faucet not only wastes water but also hikes up your bill over time. Swapping out the worn part may seem tricky, but follow these steps and you’ll have a drip-free faucet in no time.
Step-by-Step Leaky Faucet Repair Guide
Quick Fix:
- What: Stop a leaky faucet drip
- Time: 15 min
- Skill: Beginner (care with small parts)
- Tools & Materials: flathead or Phillips screwdriver, Allen wrench (if needed), replacement washers/O-rings, and any other worn parts
- Cost: $3–$10
- Safety: Turn off the water supply before you start
-
Turn off the water supply.
Find the under-sink shut-off valves or main water valve. Turn them off, then open the faucet to let any trapped water run out. -
Remove the faucet handle.
Use a flathead or Phillips screwdriver, or an Allen wrench if necessary. Insert the tool into the screw slot and gently lift the handle to avoid damage. -
Check for worn parts.
Look for cracked rubber washers, damaged O-rings, corroded valve seats, or a worn cartridge. A close inspection will show which part is making the faucet drip. -
Replace the faulty components.
Get exact replacements for each worn piece. Take the old parts with you to the hardware store so you can match size and type, ensuring a proper fit. -
Reassemble the faucet.
Put the new parts in the right order, reattach the handle, and tighten the screws securely. Check that every piece is in its correct spot before moving on. -
Restore water flow and test your repair.
Slowly turn the water back on and watch for any drips. Running the faucet lets you verify that the leak is fixed.
Essential Tools and Materials for Faucet Leak Repair
Quick Fix:
• What: Stop the drip fast
• Time: 15 min
• Skill: Beginner
• Tools: Adjustable wrench, flathead and Phillips screwdrivers, Allen wrenches, flashlight or headlamp
• Parts: Rubber washers, O-rings, faucet cartridges, valve seats
• Extras: Plumber’s grease, cloth, bucket
• Safety: Turn off the water before you begin
• Steps:
- Gather your tools and parts
- Disassemble the faucet as needed
- Swap out old parts and reassemble
Before you start, gather all your tools to avoid extra trips to the store. A good repair kit helps keep things running smoothly. Check your basic home toolbox, and if you’re missing anything, pick up an inexpensive faucet repair kit. Most items run under $20 and are available at local hardware stores.
Tools you need:
• An adjustable wrench to loosen the nuts holding faucet parts
• Flathead and Phillips screwdrivers to remove the screws and handles
• A set of Allen wrenches for models with hex screws
• A flashlight or headlamp to see inside the faucet housing
Keep these replacement parts on hand:
• A few rubber washers to replace the worn ones
• Extra O-rings to seal joints and stop drips
• Faucet cartridges if your model uses them
• Valve seats that match your faucet design
Also, have these extra supplies nearby:
• Plumber’s grease to lubricate seals for smooth movement
• A soft cloth or rag to wipe down surfaces
• A bucket for catching drips during the repair
With your kit ready, you can work confidently and avoid unexpected stops or extra store trips.
Diagnosing Faucet Leaks: Identifying the Cause of Drips
Quick Fix
• What: Find where your faucet is leaking
• Time: 15 min
• Skill: Beginner (basic home repair)
• Tools & Materials: Flashlight, wrench, cleaning cloth
• Cost: Parts $3–$10
• Safety: Turn off water if needed
-
Check your faucet type. Faucets usually come in four designs. For compression faucets, look at the rubber washer and metal valve seat for wear or corrosion. With ball faucets, check for broken springs and worn cam seals. Cartridge faucets often leak because of a bad cartridge, and disc faucets need a close look at the ceramic discs for cracks or dirt.
-
Isolate each handle. Turn off one handle at a time and shine a flashlight inside to view the parts. High water pressure (over 60 psi or 4.1 bar) can wear out seals quickly. Also, mineral buildup may damage valve seats and O-rings.
-
Test one handle at a time. Turn a single handle on and watch carefully for water escaping from its base or joints. If you see moisture around a specific handle, focus your attention there.
-
Clean and inspect the inner parts. For example, if the washer feels brittle or shows signs of corrosion, it may be time to replace it. This step-by-step check helps you find the leak quickly so you can decide on the proper fix.
Repair Techniques for Different Faucet Types

Compression Faucets
Quick Fix:
• What: Stop leaks by fixing the faucet seal
• Time: 10–15 min
• Skill: Basic handy work
• Tools: Adjustable wrench, screwdriver
• Parts: Replacement rubber washer and valve seat (if needed)
• Safety: Shut off water first
- Use your adjustable wrench to loosen the set screw on the stem. If the screw is tight, grab a screwdriver for extra grip.
- Pull out the stem and check the rubber washer and valve seat for cracks or rust.
- Replace any damaged washer. Swap out the valve seat too if it looks worn.
Tip: Bring the old parts to the hardware store to match sizes exactly.
Ball Faucets
Quick Fix:
• What: Get back smooth faucet action
• Time: 15–20 min
• Skill: Basic mechanical skills
• Tools: Screwdriver
• Parts: New ball, springs, and cams (if needed)
• Safety: Keep small parts organized and out of reach of kids
- Remove the handle to expose the ball mechanism.
- Take out the cam, ball, springs, and seats carefully. Keep these small parts aside in order.
- Look over the ball-valve assembly for signs of wear or misalignment, Delta models need extra care.
- Replace any defective parts and reassemble everything in the same order.
Tip: Organize parts as you remove them to avoid any mix-ups later.
Cartridge Faucets
Quick Fix:
• What: Seal leaks by replacing the cartridge
• Time: 10–15 min
• Skill: Basic plumbing skills
• Tools: Screwdriver
• Parts: New cartridge
• Safety: Turn off the water supply before you work
- Loosen any retaining clips or screws and pull out the old cartridge.
- Align the new cartridge with the index mark and press it in firmly.
- Secure the retaining clips or screws to lock the cartridge in place.
Tip: Press evenly to make sure the seals line up properly, preventing future leaks.
Disc Faucets
Quick Fix:
• What: Stop leaks by fixing seals on disc faucets
• Time: 10–15 min
• Skill: Basic repair skills
• Tools: Soft cloth
• Parts: New seals (if needed)
• Safety: Slowly pressurize the water to test the new seal
- Gently lift the ceramic discs from their housing.
- Wipe the discs with a soft cloth and check for grooves, chips, or mineral buildup.
- Replace the seals if you find any damage.
- Reassemble and slowly turn on the water to test the new seals.
Tip: Run a slow pressure test after reassembly to confirm the leak is fixed.
Preventive Maintenance to Avoid Future Faucet Leaks
Quick Fix:
• What: Prevent small leaks and keep your faucet running smoothly
• Time: 15 min
• Skill: Beginner
• Tools & Materials: Vinegar, plumber’s grease, pressure gauge
• Cost: Parts $3–$10
• Safety: Shut off water if you need to remove parts
- Check your faucet every 3 to 6 months. Look closely at the handles and base for a little dampness or water stains that may mean the seals are weakening.
- Remove the aerator from your faucet. Soak it in vinegar (which breaks down mineral buildup) to help restore steady water flow.
- During your check, lightly coat the O-rings and seals with plumber’s grease to keep them soft and working well.
- Use a pressure gauge on your water line. If the pressure reads more than 60 psi (around 4.1 bar), you should install a regulator to protect your faucet.
Following these steps helps your faucet last longer and stops water waste. Enjoy a leak-free, smoothly working tap!
When to Seek Professional Help for Faucet Repairs

If your repair work still leaves your faucet dripping, it’s time to call in a professional. Leaks that persist even after you swap out washers, O-rings (small rings that seal), or cartridges can signal a bigger problem. If you see rust or water damage under your sink, stop trying to fix it yourself and reach out to a licensed plumber.
• For faucets with complex cartridges or discs, you might need special tools like pullers and seat-fitters.
• Professionals can quickly shut off the water in an emergency to prevent more damage.
• A pro repair often comes with a warranty, giving you extra peace of mind.
• They also avoid problems like incorrect reassembly or missing hidden damage that could hurt nearby cabinets or floors.
If the leak keeps coming or the damage seems serious, a licensed professional can fix the faucet and help protect your home from costly water damage.
Final Words
In the action, you learned to diagnose, dismantle, and fix different faucet types. You saw how turning off the water and using a few common tools can lead to a quick, effective fix. The guide also walks you through preventive maintenance and when to call a professional. You now have a clear plan to stop drips and avoid waste. With everything laid out step-by-step, you’re set to tackle repairs confidently every time you wonder how to repair a leaky faucet. Keep at it, and enjoy the savings and peace of mind.
FAQ
How do I repair a leaky dual-handle faucet?
Repairing a dual-handle faucet involves shutting off the water supply, removing each handle with a screwdriver, inspecting for worn washers or valve seats, and replacing any damaged parts to stop the leak.
How can I fix a leaking faucet handle or a stem leak?
Fixing a leaking faucet handle or stem leak means checking the stem for worn O-rings or seals, replacing them with matching parts, and reassembling the handle tightly to prevent further drips.
How do I repair a leaky single-handle faucet in the bathroom?
The process for repairing a single-handle faucet starts by turning off the water, removing the handle, replacing the faulty cartridge or seals, and then reassembling it to ensure a leak-free fit.
Can I fix a dripping tap myself, even without tools?
While a temporary fix might seem possible without tools, a lasting repair typically needs basic tools like screwdrivers and wrenches to properly replace worn washers or seals.
How can I repair an old leaky faucet?
Repairing an old leaky faucet involves removing mineral buildup, replacing worn parts such as washers, O-rings, or seals, and checking for corrosion to restore its proper function.
How do I stop my faucet from dripping?
Stopping a dripping faucet requires identifying the source of the leak—often worn washers or seals—replacing those parts, and then testing the faucet to ensure no water escapes.
What is the most common cause of a dripping faucet?
The most common cause of a dripping faucet is a worn washer or deteriorated O-ring that fails to seal water pressure, leading to persistent drips that need repair.