
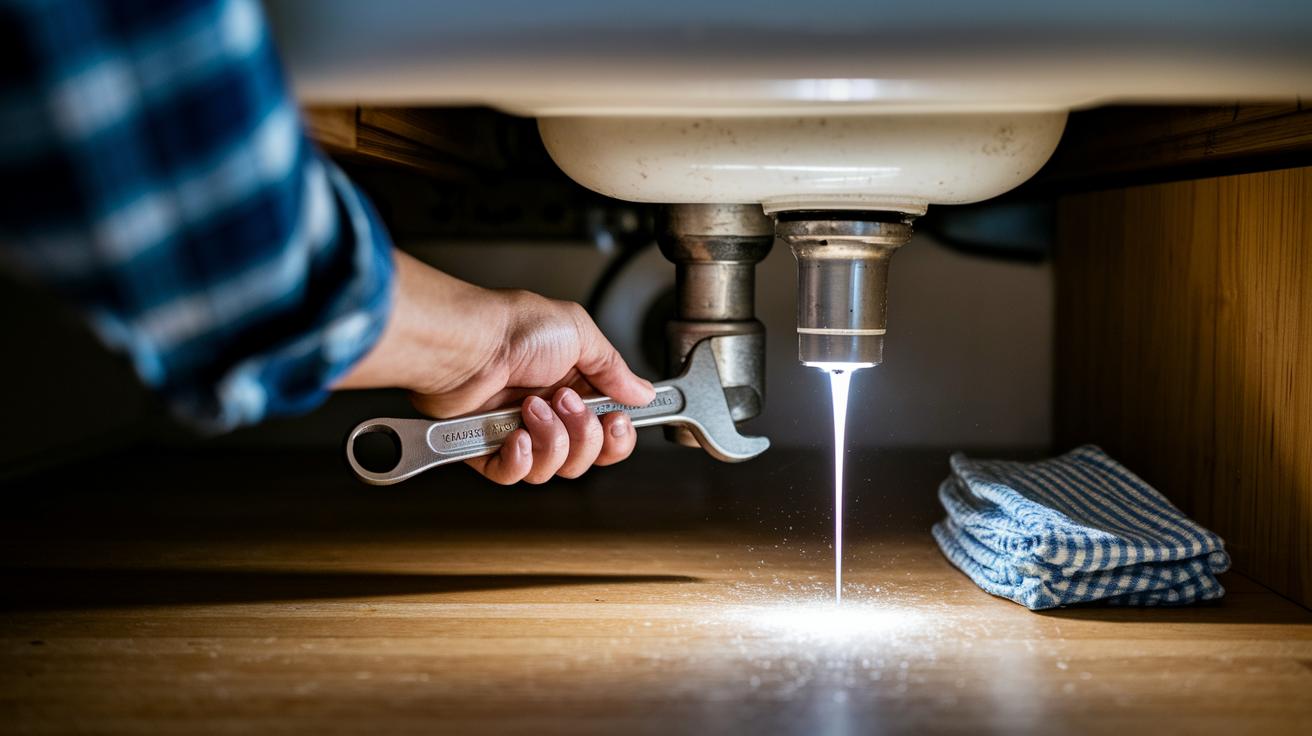
Quick Fix
• What: Stop a leaky outdoor faucet
• Time: 15 min
• Skill: Beginner
• Tools & Materials: Adjustable wrench, replacement washers, clean cloth
• Cost: Parts $3–$10
• Safety: Turn off the water before you start
- Turn off the water supply at the nearest valve.
- Check the faucet for any loose parts. Tighten them with an adjustable wrench.
- Remove and replace any worn washers (a small rubber ring that stops drips).
- Turn the water back on and test the faucet for leaks.
This simple fix saves you money and stops wasted water. Follow these steps even if you are a beginner, and you'll soon enjoy a drip-free space.
Outdoor faucet repair: Quick and reliable fixes
Quick Fix:
- What: Stop the outdoor faucet from leaking
- Time: 15 min
- Skill: Beginner
- Tools & materials: Adjustable wrench, new washers or O-rings, plumber's grease
- Cost: Parts $3–$10
- Safety: Turn off the water at the main or indoor shut-off valve
- Turn off the water. Rotate the valve clockwise until it stops.
- Tighten the packing nut by about 1/2 to 1 and 1/8 turns to help seal the leak around the handle.
- If the drip continues, check the washer and O-ring for wear. Replace them with new parts of the same size.
- Remove the handle using an adjustable wrench. Inspect the washer closely. If it looks worn, swap it for a new one.
- Rub a thin coat of plumber’s grease on the stem assembly to make it move smoothly and help prevent future leaks.
- If you see heavy corrosion, burst pipes, or complex issues with a frost-free faucet, call a professional plumber.
Diagnosing Leaks in Your Outdoor Faucet
Quick Fix:
• What: Find the leak and plan your repair
• Time: 20 min
• Skill: Beginner
• Tools & materials: Adjustable wrench, flashlight, cloth
• Cost: $0–$10
• Safety: Shut off the water before you begin
- Look at your faucet. Watch for steady drips or occasional leaks. Often, a bad washer or O-ring (a small rubber seal) is the culprit.
- Test the handle. If it turns hard or feels loose, mineral buildup or damage might be at work.
- Check the water flow. If water is weak or missing, you might have a frozen pipe or clog further down the line. A drip at the handle’s base usually points to a seal issue.
- Remove the handle. Use your adjustable wrench to take off the handle and the packing nut (the nut that holds the parts together).
- Inspect the inner parts. Look closely at the washers and O-rings for cracks or hard spots. If you have a frost-free faucet, check the vacuum breaker (a valve that stops water from flowing back into the system); leaks here might come from inside the wall.
- Feel the parts. Run your finger along them. Rough edges or rust are clear signs of where the leak is coming from.
Essential Tools and Parts for Outdoor Faucet Repair
Before you begin, gather your tools to make the repair quick and smooth. You will need an adjustable wrench, pliers, and a flat-head screwdriver to free stuck parts. Keep extra washers, O-rings, packing nuts, and bibb screws on hand to replace any old parts. Before you put everything back together, apply plumber’s grease on the stem assembly to prevent leaks later. If your faucet is frost-free, you may need a new vacuum breaker. Check a guide like "how to repair a leaky faucet" to confirm you have the right tools and parts for your setup.
| Tool/Part | Purpose |
|---|---|
| Adjustable wrench | Loosens and tightens nuts and bolts |
| Pliers | Grips and turns stubborn parts |
| Screwdriver | Removes screws and pries apart components |
| Spare washers & O-rings | Replaces worn seals to stop leaks |
| Plumber’s grease | Lubricates moving parts for smooth action |
| Vacuum breaker for frost-free faucets | Stops leaks in cold-weather models |
Step-by-Step Outdoor Faucet Repair Techniques

Quick Fix
• What: Fix a leaky outdoor faucet fast
• Time: 20 min
• Skill: Beginner (basic hand tool experience)
• Tools & Materials: Adjustable wrench, plumber's grease, spare washers, O-rings, foam or insulated cover (if needed)
• Cost: Parts $3–$15
• Safety: Shut off water at the main valve before starting
-
Turn Off and Drain
Switch off your main water supply. Open the outdoor faucet for a few seconds to drain any water, much like letting air out of a radiator. -
Remove the Handle and Packing Nut
Using your adjustable wrench, take off the handle and slowly loosen the packing nut. This will let you access the stem assembly inside. -
Check and Replace Worn Parts
Look at the washer, O-ring, and any other visible parts such as the bibb screw for damage or rust. Replace any component that looks worn out with a matching new part. -
Lubricate and Put It Back Together
Spread a thin layer of plumber’s grease on all moving parts of the stem. Slide the stem back into its slot, then tighten the packing nut about ½ to 1⅛ turn. Secure the handle firmly back in place. -
Turn Water Back On and Test
Restore the water supply and watch the faucet closely. If you notice a drip, adjust the packing nut gradually until the leak stops.
For colder months, wrap the faucet in foam or cover it with an insulated cap to help prevent freezing.
Frost-Free Tap Repair Methods for Outdoor Faucets
Quick Fix
What: Stop a leak in your frost-free outdoor faucet
Time: 15 min
Skill: Beginner
Tools & Materials: Screwdriver, wrench, new vacuum breaker if needed
Cost: Parts $3–$10
Safety: Shut off the water before you begin
- Turn off the water supply to the faucet.
- Use a screwdriver to gently lift the cap off the vacuum breaker.
- Unscrew the retainer that holds the vacuum breaker in place.
- Remove the vacuum breaker and either clean it or inspect it for damage.
- If cleaning does not end the drip, take the old breaker to a hardware store for an exact replacement.
- Install the new or cleaned vacuum breaker, screw the retainer back snugly, and replace the cap firmly.
- Turn the water back on and check that the leak is fixed.
Vacuum Breaker Replacement
- Carefully remove the cap from the vacuum breaker.
- Unscrew the retainer and lift out the old vacuum breaker.
- Match the new vacuum breaker to the old one and install it using a firm, gentle twist.
- Do not overtighten; too much force can damage the retainer and cause new leaks.
Weatherproofing and Preventive Maintenance for Outdoor Faucets

Quick Fix:
What: Protect your faucet from leaks and freeze damage
Time: 15 min
Skill: Beginner (no special skills needed)
Tools & Materials: Plumber’s grease, foam insulation or weather-resistant cover, wrench
Cost Estimate: Parts $3–$10
Safety Snapshot: Shut off water before you begin
-
Lubricate Your Faucet
Apply a light coat of plumber’s grease to the faucet stem assembly once a year. Tighten the packing nut and check the handle seals. This helps stop mineral buildup and prevents stiffness at the handle. -
Insulate During Cold Weather
When it gets cold, wrap your outdoor faucet with foam insulation or use a weather-resistant cover. This keeps water from freezing and stops cracks or burst pipes that can lead to expensive repairs. -
Keep Up with Inspections
Regularly check the stem assembly and vacuum breaker for wear or rust. Small problems caught early can save you time and money. -
Stay on Schedule
Set up seasonal maintenance visits. This routine care will help your faucet work smoothly all year long.
Remember, a little upkeep goes a long way, keeping your faucet leak-free and extending its life.
Recognizing When Professional Outdoor Faucet Repair Is Needed
Quick Check:
- Look for heavy rust or corrosion on metal parts.
- Listen for loud water pounding.
- Watch for burst or frozen pipes.
- Notice if a tap keeps leaking even after several DIY fixes.
- Check if the frost-free valve components are hard to reach.
- See if water is damaging nearby walls or the foundation.
These signs mean it’s time to call a pro. A licensed plumber has the right tools and skills to tackle issues that go well beyond simple maintenance.
Pro repair calls usually run between $50 and $150 plus parts. This fee covers checking hidden sections, performing specialized repairs, and swapping out items like washers, O-rings, or vacuum breakers. Spending a bit on professional help now can keep you from facing bigger, costlier repairs later.
Final Words
In the action, you learned how to tackle outdoor faucet repair before small leaks turn to bigger messes. We broke down the simple DIY steps like tightening nuts, swapping washers, and using plumber’s grease.
You also got clear safety tips, such as shutting off water before starting.
For tricky cases, the guide shows when a pro is needed. Keep these steps handy, and feel great about fixing your own outdoor faucet repair.
FAQ
What is an outdoor faucet repair kit?
The outdoor faucet repair kit offers the essential tools and parts for fixing leaks. It usually includes washers, O-rings, and wrenches to support a simple DIY repair.
What outdoor spigot replacement parts are available?
The outdoor spigot replacement parts include washers, O-rings, packing nuts, and screw replacements. These parts help restore proper function and stop leaks effectively.
How do you fix a leaky outdoor spigot or a faucet with a hose attached?
The repair for a leaky outdoor spigot or faucet with a hose attached involves tightening or replacing washers, O-rings, and packing nuts, while checking that the hose connection is secure.
What causes outdoor spigots to leak from the top or bottom?
The leak from the top or bottom of an outdoor spigot typically indicates worn washers or loose connections. Replacing damaged parts and tightening fittings resolves the issue.
What is the typical outdoor faucet repair cost and do you need a plumber?
The outdoor faucet repair cost generally falls between $50 and $150 plus parts. While many repairs are DIY, severe damage or corrosion may require a plumber for safe repairs.
Are outdoor faucets repairable?
The repairability of outdoor faucets is common, as many problems involve simple fixes like tightening connections or replacing washers. More extensive damage, however, might need professional help.
Who do you call to fix an outside water spigot?
The person to call for fixing an outside water spigot is a licensed plumber, especially if the issue involves extensive corrosion, frozen pipes, or hard-to-reach parts.
Do you need a plumber to replace an outdoor faucet?
The need for a plumber when replacing an outdoor faucet depends on your DIY skills; simple replacements are manageable, but complex issues, like burst pipes, are best handled by a pro.