
Quick Fix:
• What: Build a wooden key holder from scrap wood
• Time: Less than 1 day
• Skill: Beginner
• Tools & Materials: Scrap wood, measuring tape, saw, sandpaper, wood finish, hooks, nails or screws
• Cost: About $10–$20
• Safety: Wear eye protection when cutting
Steps:
- Measure & Plan – Mark your scrap wood to the size you want your key holder to be.
- Cut – Carefully saw along your marks. Take your time and keep the cut straight.
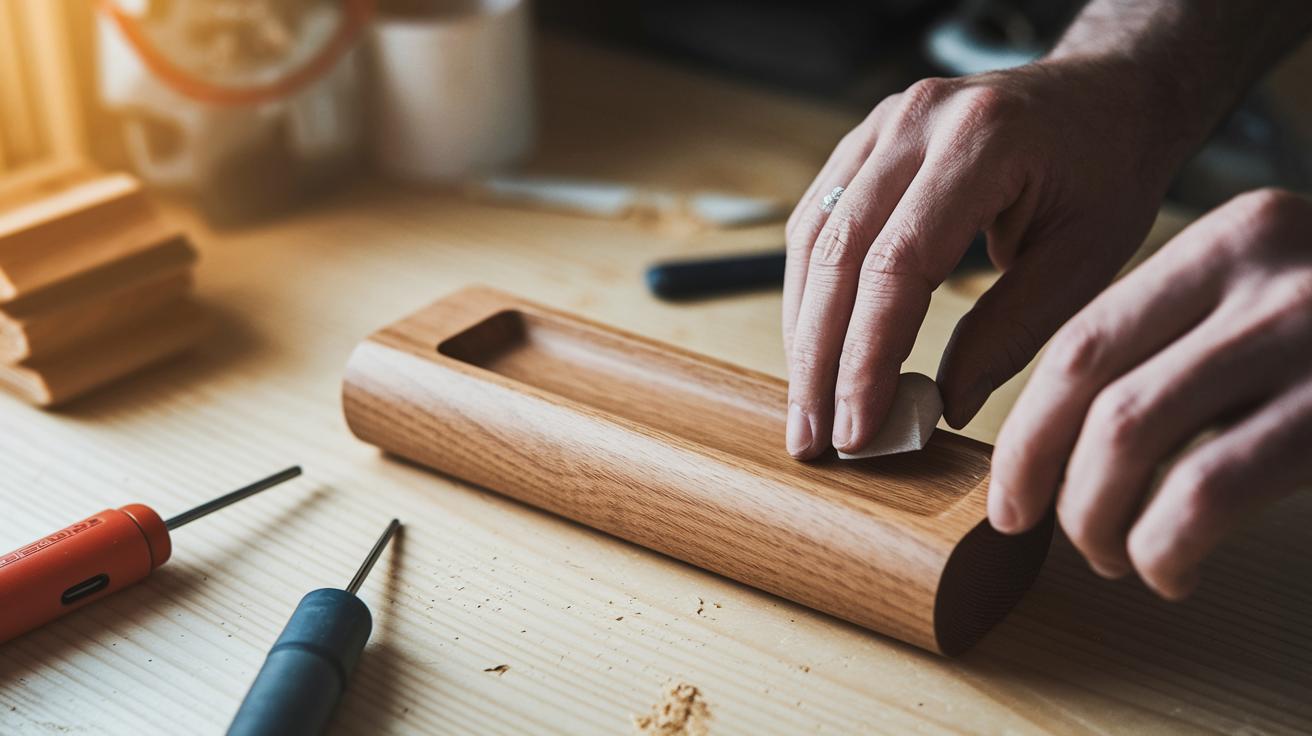
- Smooth – Sand all edges and surfaces until they feel smooth.
- Finish – Apply paint or wood finish evenly. Let it dry completely before moving on.
- Mount – Attach hooks to the wood and hang it up so you can easily organize your keys.
Tip: Take your time with sanding and finishing for a neat, long-lasting project. Enjoy your new key holder!
Step-by-Step Wood Key Holder DIY Guide
Quick Fix:
• What: Create a wooden key holder to hang your keys.
• Time: Under 1 day
• Skill: Beginner (just follow the steps)
• Tools & Materials:
- Wood pieces (repurposed frame beading, cut into 6–8 in / 15–20 cm lengths)
- 5 cup hooks
- 2 sawtooth hangers
- Wood glue
- Sandpaper (80, 120, 180, 220 grit)
- Stains (Dark Walnut for the main board, Special Walnut for accents, True Black for hook marks)
- Sealant
• Cost: Parts cost is low, typically under $20
• Safety: Wear eye protection and work in a tidy space
Steps:
- Measure and mark your wood pieces to get the size and shape you want.
- Cut the repurposed wood into pieces about 6–8 in (15–20 cm) long.
- Lay out your pieces in the design you like, then spread a thin layer of wood glue over the joints.
- Clamp the glued pieces for 5–10 min so they stick together well.
- Let the assembly cure completely for 24 hours before moving on.
- Sand the entire surface by starting with 80 grit, then move to 120, 180, and finish with 220 grit. Wipe off the dust between each step.
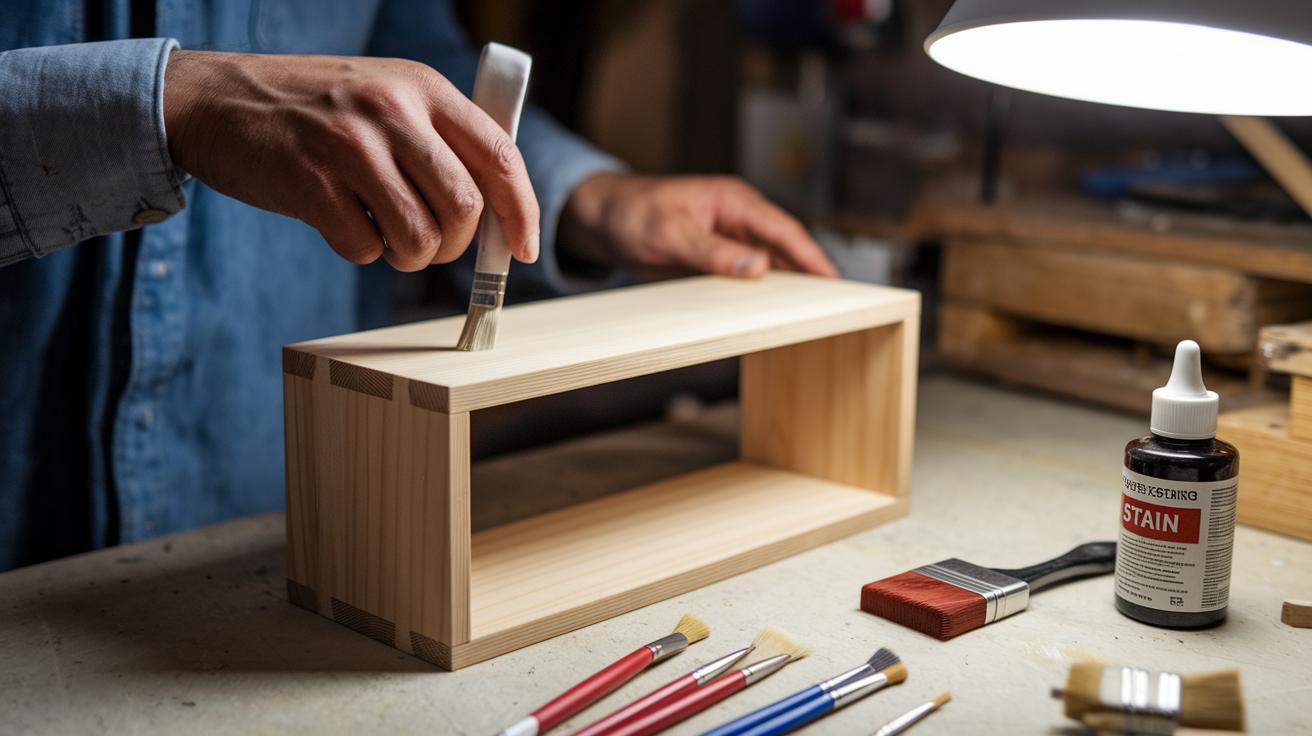
- Stain the board: use Dark Walnut on the main parts, add Special Walnut for extra touches, and mark the area for the hooks with True Black. Let each coat dry as directed.
- Mark where you will place the cup hooks: measure 3.5 in (9 cm) from one end and space each hook about 4 in (10 cm) apart, then install all five hooks.
- Attach the two sawtooth hangers on the back, keeping them within 1 in (2.5 cm) from the top edge for balanced hanging.
- Finish by applying a coat of sealant following the product instructions to protect your work.
Enjoy your new, stylish key holder that keeps your keys in order and adds a neat accent to your space!
Selecting Materials & Tools for Wood Key Holder DIY

Quick Fix:
• What: Build a wood key holder with durable design
• Time: 30 min
• Skill: Beginner
• Tools & Materials: Chosen wood, metal hooks, hangers, glue, clamps, drill bits, clear sealant (optional)
• Cost: About $7–$15 total
• Safety: Wear eye protection and work in a clear, safe space
Pick the right wood to set yourself up for a smooth build. You can use hardwood like oak or walnut for strength and a smooth finish. For a more old-school look, try reclaimed or pallet wood. You might also use repurposed photo frame beading, which is usually about 6–8 in (15–20 cm) long by 1 in (2.5 cm) thick, great for small projects.
| Wood Type | Features | ||||||||||||||
|---|---|---|---|---|---|---|---|---|---|---|---|---|---|---|---|
Hardwood
Creative Wood Key Holder DIY Ideas & VariationsTry these wood key holder projects to brighten up your wall. You can mix modern touches with rustic charm to create a useful piece that shows off your style. Mountain Shelf Key HolderQuick Fix: Steps:
Live-Edge Hook RackQuick Fix: Steps:
Personalized Sign Key HolderQuick Fix: Steps:
Mix ideas from these projects to suit your space and skill level. Play around with angles, finishes, and hook spots to make a key holder that is as playful as it is practical. Enjoy the process and let your creativity shine! Finishing Your Wood Key Holder DIY Project
Quick Fix:
Clean up by removing all sanding dust and disposing of used cloths. Mounting & Hook Installation for Wood Key Holder DIYQuick Fix:
Safety, Time & Cost Estimates for Wood Key Holder DIY
This project is quick and simple. You can finish it in just one day and spend only about $18.
Remember these safety tips:
Final WordsIn the action, you built a practical wood key holder DIY that turns repurposed wood into a neat and functional craft. You measured, cut, sanded, and stained your material carefully. You installed hooks and mounted the piece securely to create a stylish and handy key rack. Every step was quick and manageable, giving you a ready-to-use key holder in less than a day. This wood key holder DIY (small wood craft) proves that with basic tools and safety in mind, you can tackle crafty projects with confidence. FAQHow do I create an easy wood key holder DIY using small wood craft techniques?The wood key holder DIY project uses repurposed wood, minimal power tools, glue, and simple sanding. It takes under one day to cut, stain, install hooks, and mount, making it perfect for beginners. What key holder design ideas can I try for a unique wall-mounted display?The key holder design ideas range from using reclaimed wood with a live-edge style to adding personalized engravings and decorative stains. These ideas let you create a stylish, functional wall piece to organize your keys. Latest articlesMore like this |